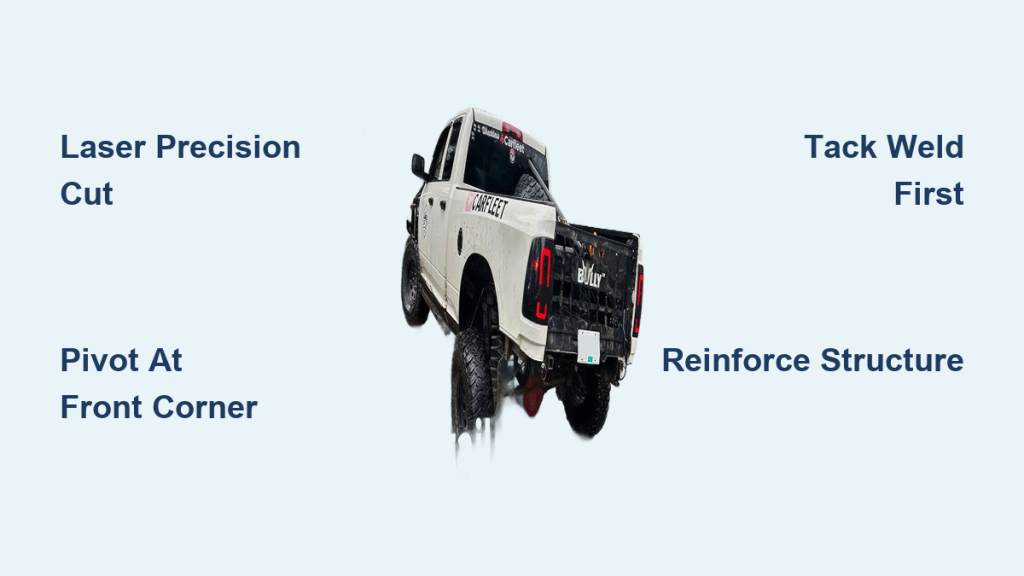
Shortening and narrowing a truck bed for better off-road clearance and a custom look isn’t just for pros. Anyone with welding skills and the right tools can do it. The key technique? Dovetailing a truck bed. This process involves cutting the bed at an angle from front to back, bringing the sides together to reduce width, and welding it back into a tighter, stronger shape. Builders commonly use this method on trucks prepped for rock crawling or trail use, where ground clearance and durability matter most.
In this guide, you’ll learn exactly how to dovetail a truck bed, from planning the cuts to final welding and reinforcement. You’ll discover how to maintain structural integrity, align cuts precisely using a laser, and avoid common mistakes that can ruin your project. Whether you’re bobbing the bed first or focusing solely on the dovetail, this breakdown covers every step with actionable tips and tool recommendations.
Plan the Bob Cut
Before narrowing the bed, decide how much shorter you want it. Most builders remove 12 to 18 inches from the rear to tuck the frame behind the cab for better clearance and a cleaner stance. The goal is to cut after the internal structural supports near the tailgate but before they vanish toward the front.
Mark the Initial Cut Line
Start by removing the tailgate and lights. Use measuring tape to find where the inner bed structure ends. This is your minimum cut point. Then measure forward the desired length (for example, 14 inches) and mark it on both outer rails. Apply masking tape along the cut path on both sides to protect paint and make lines easier to see.
Align With Laser Precision
Set up a rotating laser level across the bed floor and up the inner walls. Adjust it so the beam aligns perfectly with your marked cut points. This ensures a perfectly straight, level cut, even across corrugated metal and curved fenders. The laser acts as a continuous guide, eliminating guesswork.
Cut With an Angle Grinder
Use a 5-inch angle grinder with a cut-off wheel for the initial bob. It offers better control and less vibration than a Sawzall, especially on thick outer rails. Cut slowly along the laser line, maintaining even pressure. Focus on clean, straight cuts, because messy edges make welding harder later.
Pro Tip: Cut the outer bed rails and floor first. Leave the inner structural supports intact until alignment is confirmed.
Prepare for Welding
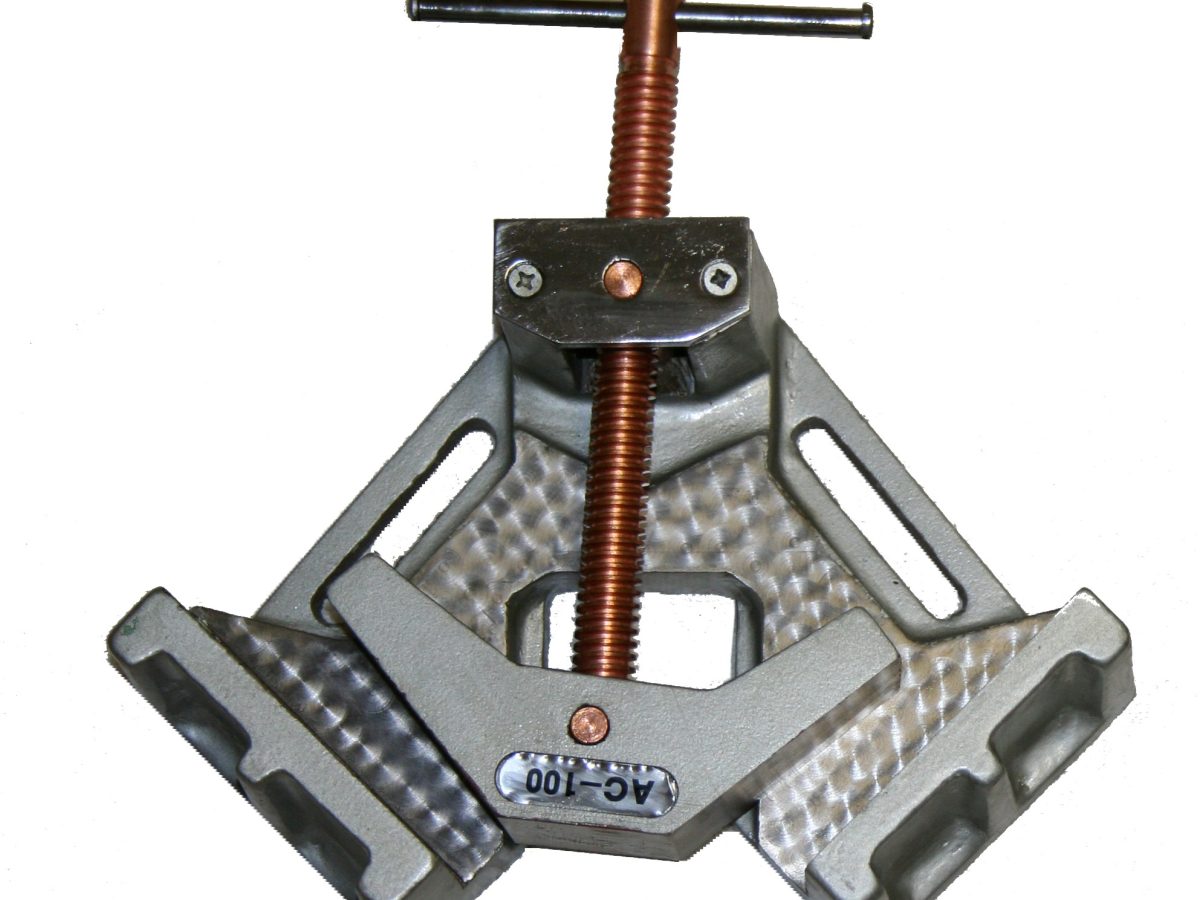
A clean cut is only half the battle. How you align and clamp the two halves determines the final strength and appearance of the bed.
Clean and Deburr Edges
After cutting, switch to a grinding wheel and clean up all cut edges. Remove burrs, slag, and uneven metal. Smooth transitions mean better fit-up and stronger welds.
Realign and Clamp the Halves
Set the rear section back in place. If working alone, weld small pieces of angle iron across the seam on both sides to act as temporary clamps. These hold the halves in position without constant hand pressure.
Alternatively, use panel clamps, which are C-clamp-style tools designed for auto body work. They pull the two sections tightly together and allow micro-adjustments for perfect alignment.
Tack Weld the Structure
Begin with tack welds along the outer bed rails and floor. Place tacks every 2 to 3 inches to hold everything in place. Don’t weld fully yet, because you still need to make the dovetail cuts. Misalignment now cannot be fixed later.
Watch Out: Avoid cutting too close to the spring hangers or receiver hitch. If you’re using longer rear springs (like 63-inch Chevys), ensure your cut doesn’t interfere with suspension travel.
Execute the Dovetail Cut
This is the heart of the process. Dovetailing narrows the bed by cutting inward at an angle from front to back, then bringing the sides together.
Set the Pivot Point
The pivot point is crucial. It should sit at the inner front corner of the bed, just behind the cab. Never use the center of the bed. This creates a diamond-shaped taper that weakens the structure and looks awkward.
Use the laser level to project a straight line from the front bed rail to the rear, parallel to the frame. This is your reference.
Mark the Narrowing Width
Decide how much to narrow the bed. A common target is 16 to 20 inches total, split evenly (8 to 10 inches per side). The goal? Align the tail lights over the frame rails for maximum ground clearance.
From your laser reference line, measure half the total narrowing (for example, 9 inches) inward on both sides. Mark these “dove points” at the rear.
Cut From Pivot to Dove Point
Using the laser, draw diagonal lines from the pivot point at the front to each dove mark at the rear. These are your cutting paths.
Use a Sawzall with a long metal-cutting blade. This tool excels at slicing through the dense underbody structure, floor ribs, and inner supports. Make multiple relief cuts if needed to prevent binding.
Cut slowly and follow the line precisely. You’re cutting through multiple layers of steel, so patience pays off.
Expert Note: The Sawzall’s ability to make plunge cuts and navigate tight spaces makes it ideal here. An angle grinder would struggle with depth and control.
Align and Weld the Dovetail
Now that the cuts are made, it’s time to close the gap and lock the new shape.
Bring Sides Together
Push the two halves inward until the cut edges meet at the rear. The bed will naturally taper from front to back. Use clamps or angle iron to hold the new shape.
Check alignment from above and the sides. The bed rails should run parallel, and the floor should be flat.
Weld the Floor and Sides
Start welding the bed floor to the inner structure. Use a MIG welder with consistent 1-inch stitch welds to prevent warping. Then weld the outer bed rails and inner supports.
Overlap the original cut from the bob and ensure all structural points are reconnected. This maintains rigidity.
Common Mistake: Skipping internal bracing. Always reattach or replace any cross-members or support ribs that were cut during the process.
Fix Fender Gaps and Reinforce
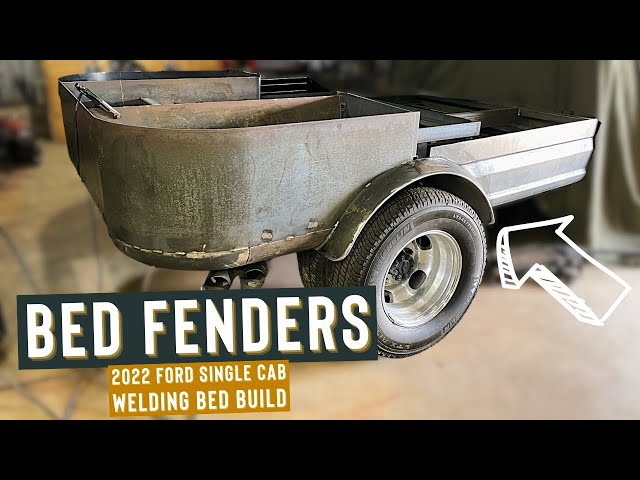
When you dovetail the bed, the front fender sections no longer line up. You’ll have a visible gap where the two halves meet.
Bridge the Fender Gap
You have two solid options here:
– Weld in a vertical patch: Cut a small rectangle of sheet metal and weld it vertically between the two fender halves. Grind smooth and blend into the contour.
– Fabricate a square replacement: Remove the fenders entirely and build a flat, square version for a boxier, more aggressive trail-truck look.
Trim Taillight Corners
Cut off the lower rear corners of the bed just under the taillights. These protrusions can hang up on obstacles. Use the angle grinder to slice them off cleanly.
Reinforce the Structure
Weld in new bracing straps across the floor and along the inner walls. Add triangulated gussets at high-stress joints, especially where the bed meets the frame.
Pro Tip: Use 1/8-inch steel plate for reinforcement. It’s strong but easy to weld without preheating.
Adjust Mounts and Modify Tailgate

With the bed shortened and narrowed, the original body mounts no longer align.
Relocate Body Mounts
The second and third body mounts will be misaligned. You have two choices:
– Reposition them to match the new bed length, or
– Remove the second mount entirely and rely on the others (common in custom builds).
Weld new mounting brackets in place using the original holes as a guide.
Extend Frame for Protection
Cut two small frame extensions (3 to 4 inches long) and weld them outward from the rear frame corners. These act as “wings” that protect the bed’s rear corners during trail impacts.
Modify the Tailgate
The original tailgate is now too wide and long. Options include:
– Cut it down to match the new bed width and re-weld the edges.
– Build a new one from square tubing and flat steel for a custom look.
If keeping the original, mark the new width, cut with a grinder, and weld the ends closed. Reinstall with modified hinges if needed.
Note: Plan this step early. The original build’s tailgate mod was not yet complete, so don’t leave it for the last minute.
Final Assembly and Results
With welding done, it’s time to finish the build.
Grind and Prep for Paint
Use a flap disc to smooth all welds. Remove any high spots and blend transitions. Sand the entire bed to bare metal for proper paint adhesion.
Paint and Inspect
Apply primer, then your chosen color. Once painted, inspect all welds for cracks or gaps. Re-weld if necessary.
Evaluate Clearance and Strength
With the bed 14 inches shorter and 18 inches narrower, the truck now has improved approach and departure angles. The tail lights sit directly over the frame rails, maximizing ground clearance.
The dovetail design maintains structural integrity while giving a clean, custom look.
Final Tip: A rotating laser level may seem like overkill, but it’s the secret to straight, symmetrical cuts, especially on complex bed shapes.
Maintenance and Trail Readiness
Your truck is now trail-ready, but upkeep matters.
Check Welds After Off-Roading
Vibration and flexing can stress welds. Inspect them every few months, especially at the dovetail seam and floor joints.
Protect Against Rust
Apply undercoating to the new weld zones and inside the bed floor. Moisture collects in seams, so prevent corrosion early.
Upgrade Suspension (Optional)
A common setup is 2-inch Super-Lift springs up front and 63-inch Chevy springs in the rear. These complement the shortened bed by leveling the stance and improving articulation.
Frequently Asked Questions About Dovetailing a Truck Bed
What is dovetailing a truck bed?
Dovetailing a truck bed is a modification that narrows the bed by cutting it at an angle from front to back and bringing the sides together. This improves ground clearance and gives a custom, aggressive look for off-road builds.
How much does it cost to dovetail a truck bed?
Costs vary based on tools, materials, and whether you hire a welder. DIY builds primarily require a welder, grinder, Sawzall, and steel plate. Professional work can run into thousands of dollars depending on your truck and the extent of the modifications.
Can you dovetail a truck bed without welding?
Welding is essential for a structurally sound dovetail. Without it, the bed cannot handle the stress of off-road use. Some hobbyists experiment with rivets or bolts, but welding remains the standard for permanent, trail-ready results.
How short should I cut my truck bed before dovetailing?
Most builders remove 12 to 18 inches from the rear. The cut should occur after the inner structural supports near the tailgate but before they fade toward the front. Always measure twice and mark carefully before cutting.
Will dovetailing weaken my truck bed?
Dovetailing does not weaken the bed if done correctly. Proper alignment, tack welds, and reattachment of cross-members maintain structural integrity. Reinforcing with bracing straps and gussets adds strength where the original structure was cut.
What tools do I need to dovetail a truck bed?
Essential tools include a rotating laser level, 5-inch angle grinder with cut-off wheels, Sawzall with metal-cutting blades, grinding wheel, MIG welder, panel clamps, and angle iron for temporary bracing. A flap disc helps with final weld smoothing.
Key Takeaways for Dovetailing Your Truck Bed
Dovetailing a truck bed is a challenging but rewarding project that transforms a standard bed into a trail-ready machine. Focus on three critical points: precision cutting with a laser level, proper alignment using clamps and tack welds, and thorough reinforcement of structural members. The dovetail pivot point must be at the front inner corner, not the center, to avoid a weak diamond shape.
With careful planning, solid welding, and attention to detail, your dovetailed truck bed will deliver years of off-road performance. Start by gathering your tools, marking your cut lines, and taking your time. The results are worth the effort, and your truck will stand out on any trail.
Your next step: Sketch your cut lines, measure twice, and set up your laser level before making the first cut. Precision now saves hours of rework later.