Drilling into a truck bed requires more care than most people expect. One wrong move can puncture a fuel line, crack a structural rib, or leave rust-spreading holes in your bed. Whether you’re mounting tie-downs, lights, or a custom accessory, learning how to drill into a truck bed correctly protects both your vehicle and your project.
This guide walks you through safe drilling zones, the right bits for steel or aluminum, and sealing techniques that prevent corrosion. You’ll also learn which mistakes to avoid so your installation lasts for years without leaks or structural issues.
Essential Safety Steps Before Drilling a Truck Bed
Before picking up a drill, protect yourself and your truck. Planning prevents costly errors.
Wear Protective Gear
Always wear safety glasses to block flying metal shavings. Cut-resistant gloves protect your hands when handling freshly cut metal edges. If you’re in a confined or dusty space, add a dust mask since inhaling fine metal particles poses health risks.
Disconnect the Battery
Wiring for taillights, sensors, or trailer harnesses often runs along bed rails and inner walls. Accidentally drilling into a live wire can short a circuit or trigger airbag sensors. Disconnect the negative battery terminal before you begin.
Clear and Clean the Work Area
Remove all cargo, drop-in liners, and loose accessories. A clean surface ensures accurate measurements and reduces vibration during drilling. Wipe the area with a damp cloth so dirt doesn’t dull your bit or cause slippage.
Required Tools and Materials for Drilling a Truck Bed
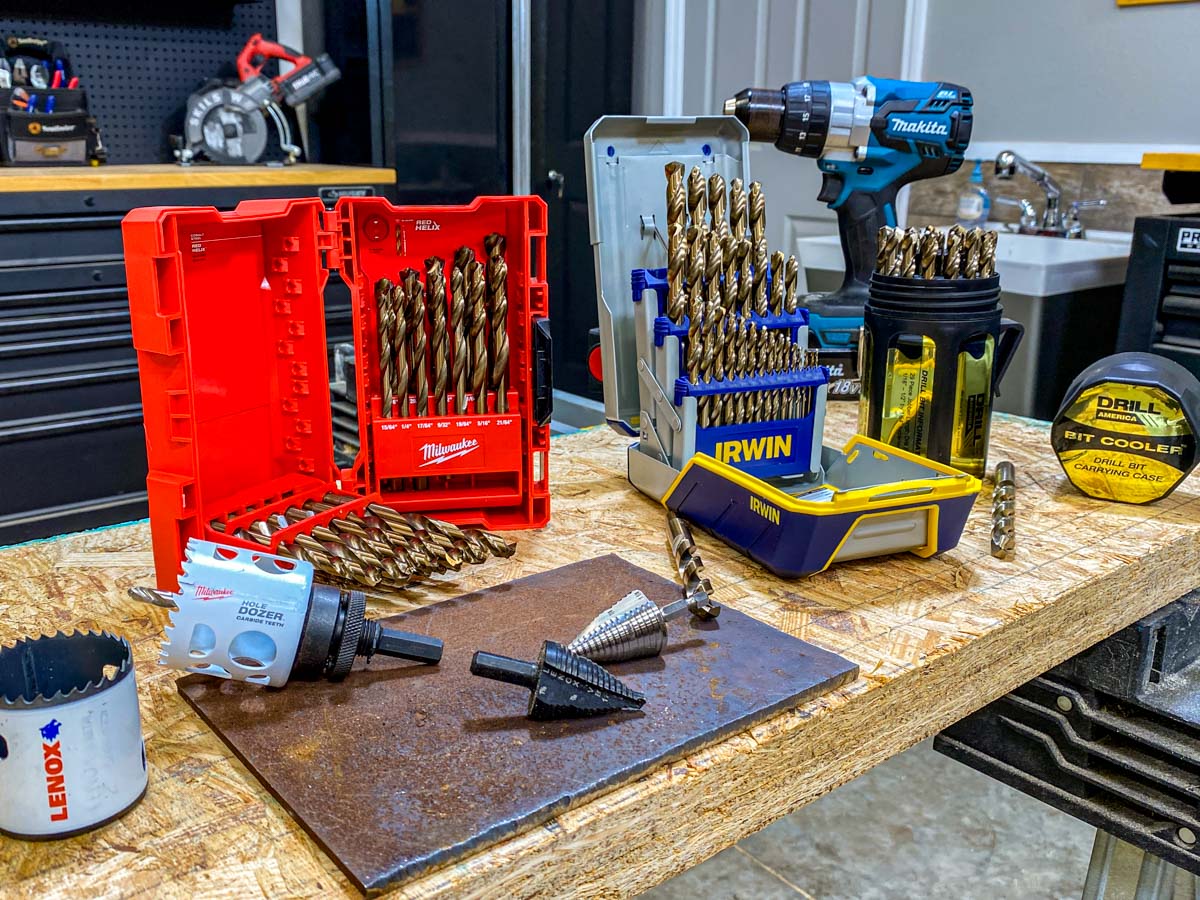
The right equipment makes the job faster, cleaner, and safer.
Drill and Bit Selection
Use a cordless drill with variable speed control or a corded drill for steady torque. Match your bit to the bed material for clean results.
| Bed Material | Recommended Drill Bit | Speed Setting |
|---|---|---|
| Steel | Cobalt or HSS | Medium-Low |
| Aluminum | Sharp HSS with split point | Medium |
| Painted Steel | Brad-point or spur-bit | Medium |
Step bits work well for larger holes and produce burr-free edges suitable for wiring grommets.
Supporting Tools
- Center punch to mark the exact spot and prevent bit wandering
- Clamps or vise grips to stabilize thin metal
- Masking tape to reduce paint chipping and improve bit grip
- Deburring tool to smooth sharp edges after drilling
- Magnetic tray to catch small hardware before it falls into cavities
Locate Safe Drilling Zones on a Truck Bed
Not every spot in a truck bed is safe to drill. Hidden reinforcements and components can turn a simple project into an expensive repair.
Avoid Structural Rails and Welded Seams
Side rails, floor ribs, and welded seams carry structural loads. Drilling through them weakens the bed and creates rust-prone spots. Target flat, open sections of the floor or sidewalls instead.
Check for Hidden Components
Inspect inside the tailgate, along inner walls, and underneath the bed for brake lines, fuel hoses, and wiring harnesses. A flashlight or borescope helps you see enclosed spaces. If you’re unsure, consult your truck’s service manual for component locations.
Use Factory Holes When Possible
Many trucks include pre-drilled holes or dimples designed for accessories. Matching your hardware to these factory points is the safest way to mount equipment.
Mark and Prepare the Drilling Spot
Accurate marking ensures your holes line up the first time.
Apply Masking Tape
Place a strip of masking tape over the intended drilling location. This prevents paint chipping and gives the bit a textured surface to grip, reducing wandering.
Measure Twice from Multiple Points
Use a measuring tape to find your mark, checking distances from the tailgate, wheel well, and bed sides. Confirm measurements before marking with a fine-tip permanent marker.
Punch a Starting Dent
Tap a center punch with a hammer to create a small indentation. This guides the bit and keeps it from sliding across the metal surface once you start drilling.
Drill the Hole Correctly in a Truck Bed
Slow, steady drilling produces clean holes and protects both the bit and the metal.
Start with a Pilot Hole
Begin with a 1/8 inch bit to create a pilot hole. Keep the drill perfectly perpendicular to the surface. A pilot hole improves accuracy for the final larger hole.
Step Up to the Final Size
Switch to the correct bit size for your hardware. For holes larger than 1/2 inch, use a step bit or hole saw. Apply light pressure and let the bit cut on its own. Pause every 10 to 15 seconds to clear shavings and prevent heat buildup.
Deburr the Edges
Run a deburring tool or metal file over both sides of the hole. Smooth edges prevent injuries and help gaskets seal properly. Wipe away metal dust with a dry cloth.
Seal and Protect the Hole Against Rust

Unsealed holes invite moisture and corrosion, especially in steel beds.
Apply Bedliner or Sealant
Spray exposed metal with rubberized bedliner coating or brush on automotive sealant. This barrier blocks water and slows rust formation. Allow the sealant to fully cure before mounting hardware.
Install Grommets for Wiring
If you’re routing wires through the hole, fit a rubber grommet to prevent insulation chafing. Secure wires with zip ties to stop vibration damage over time.
Torque Fasteners to Spec
Use stainless steel bolts paired with rubber sealing washers. Tighten to the manufacturer’s torque specification to avoid stripping threads or warping the bed metal.
Common Mistakes to Avoid When Drilling a Truck Bed
Most drilling problems come from rushing or skipping prep work.
Drilling Too Fast
Excessive RPM generates heat that warps aluminum and dulls bits quickly. Use moderate speed with frequent pauses to keep temperatures down.
Skipping the Pilot Hole
Starting with a large bit increases the chance of slipping and scratching the bed. Always drill a pilot hole first.
Blocking Drainage Paths
Factory drain holes in bed corners and under rails release trapped water. If your accessory covers one, drill a small bypass or reroute drainage to prevent pooling.
Alternative: Adhesive Mounting Instead of Drilling
If drilling feels too invasive, certain accessories can be mounted with industrial adhesives.
Choose Heavy-Duty Bonding Products
3M VHB tape or two-part epoxy holds lightweight items like cameras, LED light strips, or small brackets. Clean the mounting surface with isopropyl alcohol before applying for maximum adhesion.
Recognize Adhesive Limitations
Adhesives bond best to flat, rigid surfaces. They are not suitable for heavy items like tonneau covers or large tool mounts. Always check the weight rating before relying on adhesive alone.
Frequently Asked Questions About Drilling Into a Truck Bed
Can you drill into a truck bed without hitting anything important?
Yes, if you avoid structural ribs, welded seams, and known wiring or fuel line routes. Inspect the area with a flashlight and consult your service manual before drilling. Targeting flat, open sections of the bed floor or sidewalls keeps you clear of most hazards.
What drill bit works best for an aluminum truck bed?
Use a sharp high-speed steel bit with a 135-degree split point. This design cuts cleanly without grabbing or wandering. Keep drill speed moderate and use cutting fluid to prevent heat buildup.
Should I seal holes in a truck bed after drilling?
Absolutely. Apply rubberized bedliner coating or automotive sealant to every exposed hole. This prevents rust and water intrusion, especially in steel beds where corrosion spreads quickly.
Is it safe to drill through a truck bed liner first?
Yes, but remove the liner section covering the drill spot when possible. If the liner is permanent, use a step bit that can handle composite materials, and seal both the liner and metal after drilling.
How do I find factory pre-drilled holes in my truck bed?
Check your owner’s manual or search online forums specific to your truck model. Most manufacturers place dimples or small holes along the bed rails and floor for accessory mounting. A bright flashlight held at a low angle makes these dimples easier to spot.
Final Thoughts on Drilling Into a Truck Bed Safely
Drilling into a truck bed is straightforward when you plan ahead, respect the material, and seal every hole afterward. Focus on three priorities: locate a safe zone away from structural ribs and hidden wiring, use the correct bit for steel or aluminum, and protect exposed metal with bedliner or sealant. These steps keep your truck strong, rust-free, and ready for whatever accessory you need to mount. Before your next project, grab your measuring tape and center punch, then take your time for a clean, professional result.