
A dented, rusty truck bed doesn’t just hurt your truck’s appearance. It also weakens the structure, lowers resale value, and shortens the life of your vehicle. Whether you drive a ’94 F-150, a ’95 F-250, or a classic ’79 Dodge D150, knowing how to repair truck bed damage properly saves you thousands in body shop costs. This guide walks you through the entire process, from inspection to final polish, using real-world techniques that work.
You’ll learn which tools to buy, how to fix rust holes without welding experience, when to use filler, and the exact sequence to avoid costly redo’s like paint bubbling or filler cracking. Even if you’ve never held a grinder before, you can start small, build confidence, and get professional-looking results.
Inspect Your Truck Bed Before Touching Any Tools
Jumping into a truck bed repair without a clear plan wastes time, materials, and money. A thorough inspection helps you decide what you can handle and what needs a professional.
Identify Rust vs. Dents Early
Rust and dents demand different repair methods, so sorting them out first matters. Surface rust looks like flaky orange or brown spots and grinds off easily. Penetrating rust eats through the metal, creating holes that require cutting and patching. Dents range from shallow door dings to deep creases that may hide cracked steel underneath.
A simple magnet test reveals how much metal remains. If the magnet does not stick, the steel is too thin to support filler and needs a patch panel.
Document High-Risk Areas
Grab your phone and photograph every problem zone. Common trouble spots include:
– Frame rails – Rust here threatens the whole truck
– Bed corners and seams – Moisture collects and starts corrosion
– Wheel wells – Stone chips expose bare metal
– Floorboards – Often hidden until they rust through
Photos help you track progress and decide whether to repair a section or order a replacement panel.
Gather the Right Tools Before You Start
Cheap tools produce cheap results. Investing in quality equipment, especially for sanding and painting, separates a professional finish from a hack job.
Essential Body Repair Tools
- Angle grinder with cutoff wheel – Cuts out rust and smooths welds
- MIG welder – Best choice for beginners installing patch panels
- Dent puller and heat gun – Removes dents without panel replacement
- Air compressor and HVLP spray gun – Delivers even primer and paint
- Sanding supplies – 120, 220, and 320-grit sandpaper for each stage
- Magnetic body filler gauge – Confirms even filler thickness
- Wax and grease remover – Prevents adhesion failure from oil residue
Safety Gear You Cannot Skip
- Respirator – Filters paint fumes and metal dust
- Safety goggles – Protects eyes during grinding
- Heat-resistant gloves – Shields hands from filler chemicals and hot metal
- Ventilated workspace – Reduces fume buildup during painting
Skip the bargain spray gun. A $50 model causes runs and orange peel. Spend more upfront or save money by outsourcing the paint job while you handle metalwork.
Cut Out and Patch Rust Holes the Right Way
Rust is the number one enemy of any truck restoration. Once you spot a hole, treat it as urgent. Waiting only lets the damage spread to nearby panels.
Remove Every Trace of Corroded Metal
Mark the rusted section with a marker, then cut a clean square or rectangle around it using an angle grinder. Cut slightly larger than the visible rust to make sure you reach solid, shiny metal underneath. Stopping where the rust “looks mostly gone” guarantees the corrosion returns under your filler within months.
After cutting, grind the edges smooth so the patch panel sits flush against the surrounding steel.
Weld In a Patch Panel
You have three options for sourcing the patch:
– Junkyard donor metal – Cheap and matches original thickness
– OEM-style patch panels – Order online for popular trucks
– Custom-fabricated sheet metal – Requires advanced skills
Tack weld the patch into place first, then run a continuous bead around the edges. Grind the welds flush with the surface so they blend smoothly into the original panel. This creates a flat base for filler and paint.
Pull Dents Without Replacing Panels
Not every dent requires welding or filler. With patience and the right technique, you can restore the original shape of the metal.
Heat and Pull the Damage Out
Plug in your heat gun and warm the dented area for 30 to 60 seconds. The heat softens the metal and makes it more pliable. Apply a dent puller using steady, gradual pressure. Pull a little, step back, and reassess before pulling again.
If you can access the back side of the panel, push the dent out from behind while heating the front. This often produces smoother results than pulling from the outside.
Practice on Scrap Metal First
Every dent behaves differently. Before working on your truck, grab a piece of scrap sheet metal and create test dents to practice on. Watch YouTube tutorials like “F-150 OBS dent repair” for real-time demonstrations. Visual learning cuts your learning curve dramatically.
Apply Body Filler the Way Professionals Do

Body filler (commonly called Bondo) bridges small gaps and smooths transitions between welded patches and original metal. But misuse leads to cracking, shrinkage, and paint failure.
Prep the Surface for Strong Adhesion
Wipe the area with wax and grease remover to eliminate oil, wax, and silicone. Sand with 120-grit paper to create a rough profile that the filler can grip. Any paint, rust, or moisture left behind causes the filler to peel later.
Mix the filler with hardener using a pea-sized drop per golf ball-sized scoop of filler. You have about 10 to 15 minutes of working time before it kicks off, so mix small batches.
Build Up Thin Layers, Not One Thick Coat
Spread the filler with a plastic or metal spreader, keeping each layer under 1/8 inch thick. Thick coats shrink, crack, and refuse to cure evenly.
Let each layer harden fully, then sand in progression: 120-grit to shape, 220-grit to refine, and 320-grit to smooth. Run a magnetic filler gauge across the surface to confirm the filler sits level with the surrounding metal.
Prime Bare Metal Before Any Paint Touches the Truck
Primer is not optional. Skipping it is the single most common reason paint jobs bubble, peel, or fail within months.
Choose the Correct Primer for the Job
- Epoxy or urethane primer – Seals bare metal against moisture
- Sanding primer – Builds a smooth surface over filled areas
Apply two to three thin, even coats. Let each coat dry completely, then scuff it with 320-grit paper before adding the next layer. This creates the ideal base for color paint.
Stop Bubbling Before It Starts
Paint bubbles form for three predictable reasons: skipped primer, painting over moisture, or poor surface prep. If bubbles appear, sand back down to bare metal, re-prime, and start the paint process over. Frustrating, yes, but cheaper than living with a permanent flaw.
Spray Paint with Professional-Looking Results
A bad paint job stands out from across the parking lot. A good one looks factory fresh. The difference comes down to equipment, environment, and technique.
Set Up a Clean Spray Booth
Paint in a dust-free, dry, shaded space. Cover the ground and nearby objects with plastic sheeting. Wear a respirator and avoid windy days, which blow debris into wet paint.
Your air compressor must deliver enough CFM to run the spray gun continuously. Quality HVLP guns cost more but produce far smoother results than cheap cans or low-end guns.
Lay Down Thin, Overlapping Coats
Shake the paint thoroughly. Hold the gun 6 to 8 inches from the surface and spray in horizontal passes with about 50% overlap. Let each coat flash dry for 5 to 10 minutes before applying the next.
Finish with a clear coat to protect the color and boost shine. After the paint cures for 24 to 48 hours, polish the surface to remove minor orange peel and bring out the gloss.
Replace Panels When Repair Makes No Sense
Sometimes patching costs more time and money than swapping in a fresh panel. Knowing when to replace saves headaches.
Start with Removable Panels as Practice
Beginners should work on fenders and doors first. These unbolt easily and can be worked on a bench, which reduces stress and improves accuracy. Once you build confidence, move to hoods and quarter panels, which demand more precision and proper alignment.
Decide Whether to Repair or Replace
Ask yourself three questions before committing to a patch:
– Is the metal too thin or weak to support filler?
– Does the rust sit in a structural area like a frame rail?
– Would a new OEM panel cost less than your labor and materials?
Check salvage yards and online suppliers for full bed replacements. Reproduction beds are available for many classic trucks and often beat the cost of extensive rust repair.
Prevent Future Damage to Your Repaired Bed
A fresh repair won’t last without basic protection. A few simple habits keep your truck bed looking sharp for years.
Apply Rust Inhibitor to Vulnerable Areas
Spray rust inhibitor products like Fluid Film or Rust-Oleum Bedliner Shield inside frame rails, along bed seams, and under wheel wells. These products displace moisture and stop corrosion before it starts.
Install a Bed Liner for Daily Protection
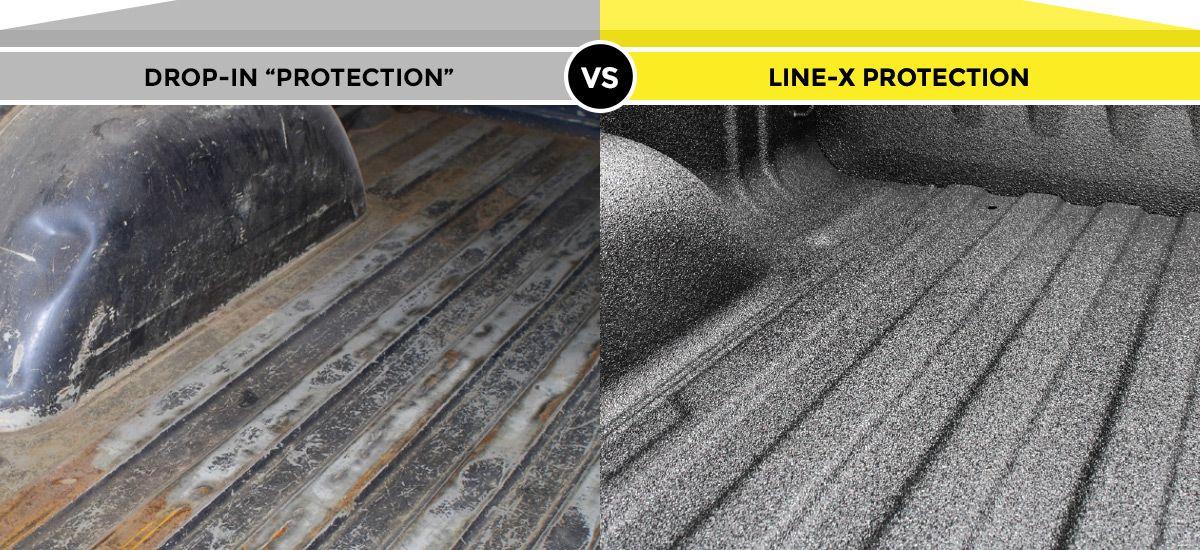
Spray-in or drop-in bed liners absorb impacts from cargo and prevent scratches, dents, and moisture buildup. They rank among the best investments for any daily-driven truck.
Maintain Your Bed Every Season
- Wash the bed after hauling dirt, salt, or chemicals
- Touch up paint chips immediately to stop rust
- Inspect for new rust spots every six months, especially in wet or snowy climates
Avoid the Costliest Beginner Mistakes
Even experienced DIYers slip up. Learning from common errors keeps your project on track.
Don’t Skip Grit Steps During Sanding
Going straight from 120-grit to paint leaves deep scratches that show through the finish. Always progress through 120, 220, and 320-grit to create a flawless base.
Treat Small Rust Spots Immediately
A dime-sized rust spot today becomes a fist-sized hole next year. Grind, prime, and seal the moment you spot corrosion.
Never Apply Thick Filler Coats
Thick Bondo shrinks, cracks, and refuses to hold paint. Stick to thin layers, let each cure fully, and sand between applications.
Frequently Asked Questions About Truck Bed Repair
Can I repair a truck bed without welding experience?
Yes, for minor dents and surface rust, you can use body filler and sandpaper without touching a welder. However, rust holes require cutting out the bad metal and welding in a patch panel. If you don’t own a welder, borrow one or hire a shop to handle the welding while you do the filler and paint work.
How long does a full truck bed repair take?
A basic dent and rust repair typically takes one to two weekends, including curing time between filler, primer, and paint. A full bed restoration with rust patching and repainting can span several weeks. Plan extra time for drying between each stage since rushing causes failures.
What is the biggest mistake beginners make?
Skipping primer ranks as the most common and most expensive error. Without primer, paint bubbles within weeks and peels off in sheets. Other frequent mistakes include applying filler too thick, rushing sanding steps, and using cheap spray equipment.
Should I repair or replace my truck bed?
Repair makes sense when damage is limited to dents, small rust spots, or isolated holes. Replacement becomes the better option when rust covers large sections, structural panels are compromised, or the bed floor has multiple holes. Compare the cost of materials and your time against the price of a used or reproduction bed.
How do I prevent rust from coming back after repair?
Apply rust inhibitor to all repaired areas, inside seams, and under the bed. Fix paint chips immediately with touch-up paint. Wash the bed regularly, especially after exposure to road salt. Installing a bed liner adds a protective barrier against moisture and impacts.
Final Thoughts on Repairing Your Truck Bed
Learning how to repair truck bed damage builds real, transferable skills and saves serious money compared to body shop rates. Start with a small project like a dent or a single rust spot. Master each stage before moving to the next: cut out rust fully, pull dents patiently, apply filler in thin coats, prime every bare surface, and spray paint with proper equipment.
Your first repair won’t be perfect, and that’s fine. Even seasoned restorers learned by trial and error. Focus on the process, follow the correct order, and protect your work once it’s done. Pick up your grinder, block off a weekend, and start transforming that beat-up bed into something you’re proud to show off.
Word count: ~2,150 words


