
If your Bakflip tonneau cover is blocking full bed access or you need to haul oversized gear, removing it quickly and safely is essential. Designed for frequent uninstalls, Bakflip covers like the F1, G2, MX4, and truck-specific models can typically be removed in under 10 minutes. This guide walks you through every step with model-specific details, tool requirements, and pro tips to make removal smooth and reinstallation accurate.
Release Rear Fasteners First
Before lifting anything, start at the back. The rear connection keeps the cover anchored near the tailgate and must be released to begin removal.
Find the Rear Attachment Points
Open the Bakflip completely and fold all panels back toward the tailgate. With the tailgate lowered, locate the rear fasteners on both corners beneath the last panel. These vary by model but are usually plastic D-line knobs, thumbscrews, or threaded connectors.
• Bakflip G2/MX4 feature D-line knobs or large plastic knobs under each rear corner
• Bakflip F1 uses thumb knobs to secure the rear with no tools needed
• 2017 Toyota Tundra models may include a central screw or bolted clamp system
Unscrew or Unlatch the Knobs
Rotate each knob counterclockwise by hand or with a socket. Plastic knobs on G2 and MX4 models may need a 14mm or 15mm socket if stiff. Thumbscrews should be turned until fully disengaged without forcing. D-line connectors sometimes require a small screw to be loosened first.
Once both sides are free, the rear of the cover is no longer secured. Do not attempt to lift yet because front latches still hold it in place.
Disengage Front Latches or Pins
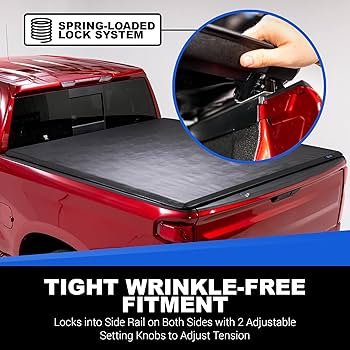
With the rear released, the next step is freeing the front. This prevents binding and allows clean removal.
Fold Cover Forward Slightly
Gently push the folded cover toward the cab just enough to relieve tension on the front mounts. This makes latches easier to release.
Remove Front Fasteners by Model
The front connection differs across models, so know yours before prying or forcing.
Bakflip F1: Release Knobs at Cab End
Two hand-tightened knobs connect the front of the cover to brackets near the cab. Unscrew both completely. No tools are required.
Bakflip G2: Pull Out Mounting Pins
After rear release, two steel or plastic pins slide out from brackets mounted in the bed rail. Grasp and pull straight out. If stuck, wiggle gently.
MX4: Remove Central Thumb Screw or Bolt
Some MX4 models use a thumbscrew or carriage bolt near the windshield edge. Remove it with a screwdriver or by hand. Others have clamped latches where you lift the release tab.
2017 Toyota Tundra: Unscrew Central Bed Rail Screw
Use a flat-head screwdriver to remove the central screw that extends into the bed rail. Repeat on the opposite side. This fully detaches the front.
Pro Tip: Take photos before removing fasteners. This helps during reinstallation, especially if you’re doing a full rail removal.
Lift the Cover Out Safely
Now that both ends are free, it is time to remove the cover from the bed.
Prepare for Lifting
Clear the area behind the truck and have a soft surface ready such as grass, a mat, or a foam pad to place the cover on. Use two people if possible. While the cover is lightweight at 40 to 60 pounds, its size increases the risk of scratches or strain.
Lift Straight Up
Grasp the sides of the cover near the front and rear. Lift straight up without tilting or dragging. Tilting can catch on rail edges or damage gaskets. Keep fingers clear of hinge areas and avoid placing pressure on the center panels.
Once clear, lower the cover gently onto your prepared surface, hinge-side down if folded.
Warning: Never leave the cover leaning on the cab. It can scratch paint or fall during wind gusts.
Remove Side Rails for Full Uninstallation
If you need full bed access for dent repair, liner replacement, or long-term storage, remove the side rails too.
Locate the Three Clamps Per Side
Each aluminum rail is held by three clamps bolted to the truck bed rails. One clamp sits near the cab, one in the middle, and one near the tailgate. These are visible from outside the bed. Look for bolts on the underside of the clamps.
Remove Clamp Bolts by Model
Use the correct socket based on your model. The 2017 Toyota Tundra uses a 14mm socket with lock washers that should be saved. The Bakflip G2 uses a 15mm socket with three bolts per side. The F1 and MX4 use either a 14mm or 15mm socket, so check before starting.
Unscrew each bolt completely. Keep hardware organized using a container or magnetic tray.
Detach and Remove Rails
After all bolts are out, grip the rail near the cab end and twist slightly inward to disengage from any retaining brackets. Pull the rail outward and upward to clear the bed wall. Repeat on the other side.
Rails are extruded aluminum and can bend if dropped, so handle with care.
Extract Drain Hoses and Grommets
Bakflip covers have integrated drainage that routes water out through the bed.
Find the Drain Hoses
Look along the inner edge of each rail for rubber hoses extending through grommets in the truck bed.
Pull Hoses from Grommets
Gently tug each hose to remove it from the grommet without yanking, which can tear the rubber seal. Inspect grommets for cracks or wear and replace if damaged to prevent future leaks.
Model-Specific Removal Steps
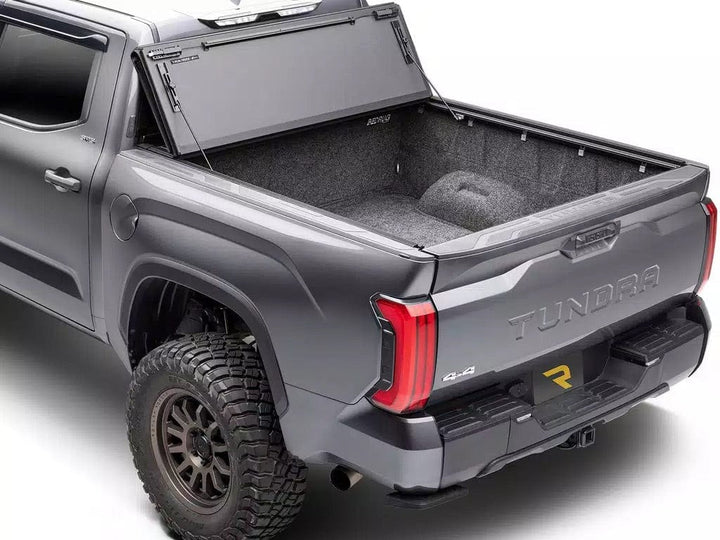
Each Bakflip model has slight differences in fasteners and layout.
Bakflip F1: Tool-Free Removal
Flip the cover fully back and unscrew two hand knobs at the cab end. There are no rear tools to release. Simply lift off. This process takes about 5 to 7 minutes.
Bakflip G2: Bolted Rail System
Flip back and release D-line knobs at the rear, using a 15mm socket if needed. Pull front pins after the rear is free. For full removal, remove three 15mm bolts per side on the clamps, then lift the cover and rails.
Bakflip MX4: Thumbscrew or Knob Variants
Unscrew two large plastic knobs under rear corners by hand. Some models have a central thumbscrew near the windshield that must be removed to free the front. Align carefully when reinstalling.
2017 Toyota Tundra: Clearance-Sensitive Removal
Remove 14mm nuts on clamps near the cab and take out the central bed rail screw with a flat-head screwdriver. Repeat on the opposite side. Fold the last panel up, then lift the cover straight out. Remove side rails using a 14mm socket on three brackets per side and extract drain hoses, which is especially important near the fuel tank.
Reinstall with Perfect Alignment
Putting the cover back right ensures smooth operation and weather protection.
Reverse Removal Steps
Place the cover into the bed, aligned centrally. Reinsert front pins or tighten knobs. Reconnect rear fasteners. For rails, reinstall clamps using saved hardware.
Mark Clamp Positions
Before full removal, use painter’s tape or a marker to outline clamp positions on the bed rail or plastic trim. This ensures perfect reinstallation and prevents misaligned rails that cause binding.
Tighten Evenly
Snug all bolts or knobs slightly first, then go back and fully tighten. This prevents warping or stress on the cover.
Test it: Open and close the cover 2 to 3 times. It should latch smoothly with no resistance.
Avoid Common Mistakes
Even simple removal can go wrong without attention to detail.
Do Not Lose Lock Washers
These small, toothed washers prevent bolts from vibrating loose. Losing one per side is common and risky. Use a magnetic tray or labeled bag and count them before and after.
Never Force Stuck Fasteners
If a knob will not turn, apply penetrating oil like WD-40 and wait 5 minutes. Use gloves for better grip. Avoid pliers because they can strip plastic knobs.
Do Not Skip Drain Hose Check
Forgetting to remove or reinstall hoses can cause water pooling, lead to corrosion or mold, and block access during bed work.
Time and Effort Estimates
Know what to expect based on your experience and scope.
| Task | Time | Difficulty |
|---|---|---|
| Cover only (experienced) | 5-7 min | Easy |
| Cover only (first time) | 10-15 min | Moderate |
| Cover + rails | 15-25 min | Moderate |
| Full removal with marking | 20-30 min | Easy with prep |
Security and Maintenance Tips
Keep your Bakflip secure and in top shape.
Be Aware of Latch Vulnerability
A known issue is that a straightened wire hanger can slip under the front edge and pull the internal latch. Always lock your tailgate and consider adding a secondary lock or alarm for high-value cargo.
Maintain Hardware and Rails
Clean rail tracks monthly with a damp cloth and apply silicone spray occasionally for smooth clamping. Store the cover in a dry, shaded area because UV exposure degrades seals over time.
Warranty and Reusability
Removal and reinstallation do not void warranty. Covers are designed for hundreds of removals if handled properly. Just keep all original parts.
Frequently Asked Questions About Removing a Bakflip Tonneau Cover
How long does it take to remove a Bakflip tonneau cover?
Removing just the cover without the rails takes about 5 to 10 minutes for experienced users. First-time removal may take 10 to 15 minutes. Full removal including side rails takes 15 to 25 minutes.
Do I need tools to remove my Bakflip cover?
It depends on the model. The Bakflip F1 and MX4 use hand-tightened knobs and thumbscrews, allowing tool-free removal. The G2 and Tundra models require a 14mm or 15mm socket for the rail clamps.
Can I remove just the cover and leave the rails installed?
Yes. For quick bed access, you can remove only the cover panels while leaving the side rails in place. This is ideal for loading medium-sized items.
How do I reinstall the cover without misalignment?
Mark the clamp positions with painter’s tape before removal. When reinstalling, place the cover centrally, hand-tighten all fasteners slightly first, then fully tighten in stages to ensure even pressure.
Does removing the cover void the warranty?
No. The manufacturer designed Bakflip covers for repeated removal and reinstallation. As long as you handle the hardware properly and reinstall all parts, the warranty remains valid.
Key Takeaways for Removing Your Bakflip Tonneau Cover
The Bakflip tonneau cover is one of the easiest hard covers to remove, with most models allowing tool-free access in under 10 minutes. By following the correct sequence, releasing rear fasteners first, then disengaging front latches, and lifting straight up, you will protect your truck and cover. Save every washer, mark clamp positions, and inspect drain hoses to ensure smooth reinstallation. Whether you drive a Tundra, Silverado, or F-150, this system is built for repeat use. Remove it confidently, store it safely, and put it back like a pro.


