A damaged truck bed can turn a reliable workhorse into an eyesore. Rust spots, dents, and holes hurt curb appeal, compromise cargo safety, and drain resale value. If you’re facing deteriorating metal in your truck bed, installing truck bed repair panels offers a cost-effective fix that restores both strength and appearance. This guide walks you through every step of the process.
You will learn how to prep the area, remove damaged sections, fit new panels, and secure them properly. No need to replace the entire bed or pay for expensive body shop work. With the right tools and attention to detail, you can complete the job in a weekend and achieve a professional-quality finish.
Essential Tools and Materials for the Job

Before starting, gather all necessary supplies to avoid delays. Working on a truck bed requires precision and safety, so being fully equipped ensures a smooth installation.
Required Tools for Installation
- Angle grinder with cut-off and flap discs
- Welding machine (MIG recommended for beginners)
- Drill with metal bits and rivet gun (if not welding)
- Sheet metal shears or plasma cutter
- Clamps and C-clamps for securing panels
- Body hammer and dolly for shaping
- Measuring tape and straight edge
- Safety gear: gloves, goggles, respirator, welding helmet
Choosing the Right Repair Panel
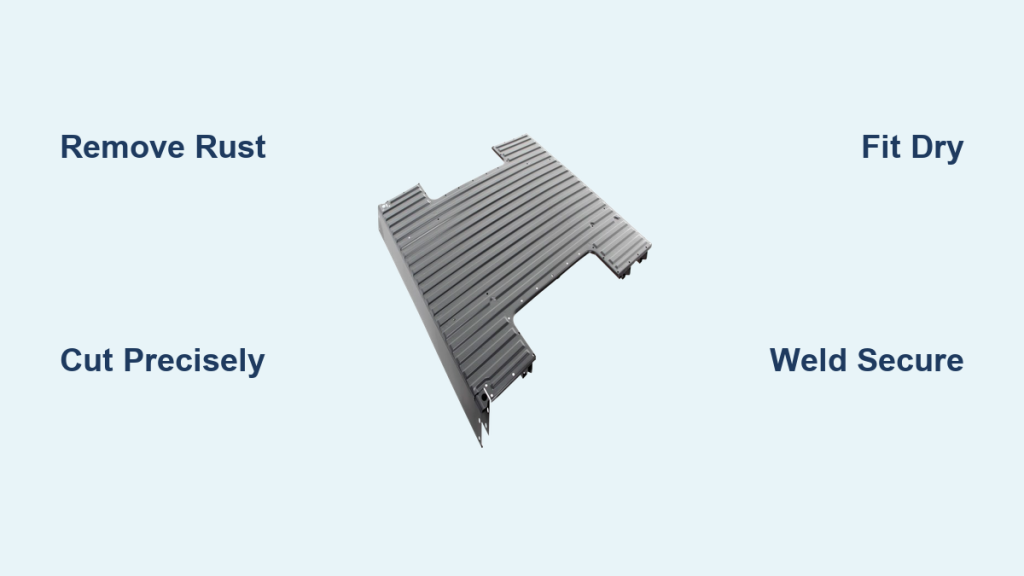
Truck bed repair panels come in various shapes including quarter panels, lower side rails, stake pockets, and floor sections. Make sure the panel matches your truck’s make, model, and bed size. Most are sold as stamped steel replacements designed to align with factory seams.
Opt for E-coated or galvanized steel panels to resist rust. Avoid cheap, thin metal that may warp during welding. OEM-style panels often include pre-punched holes for bolts or alignment features that simplify installation.
Prepare the Damaged Area Before Cutting
Proper preparation is critical. Skip this step, and even the best panel will look uneven or fail prematurely.
Remove Rust and Loose Material
Use an angle grinder with a wire wheel to strip paint, rust, and sealant around the damaged zone. Expose bare metal so you can assess the full extent of corrosion. Look for hidden rust beneath seams or under trim pieces.
Cut away any flaking or perforated metal. The remaining structure must be solid to support the new panel. If adjacent areas feel spongy, expand the repair zone to ensure a strong bond.
Mark and Cut Out Damaged Section
Trace the replacement panel’s outline onto the truck bed as a cutting guide. Leave a small margin (about 1/8 inch) outside the line to allow for adjustments.
Use a cut-off wheel or plasma cutter to remove the damaged metal. Cut slowly and steadily to avoid gouging surrounding areas. Once removed, clean the opening with a flap disc to create a smooth, flat surface for welding.
Fit and Align the New Repair Panel
A poorly fitted panel leads to gaps, misaligned seams, and future rust. Take time here to get it right.
Dry-Fit Before Welding
Place the new panel into the opening without fastening it. Use clamps to hold it in position. Check for flush alignment along all edges. The panel should sit level with the surrounding metal, not raised or recessed.
If gaps exist, gently bend the panel with a hammer and dolly or trim excess with sheet metal shears. Some minor shaping is normal since factory panels aren’t always perfect.
Ensure Proper Seam Alignment
Pay close attention to seams near tailgates, wheel wells, or stake pockets. These areas are visible and affect water drainage. The new panel should follow the original contour of the bed. Use a straight edge to verify flatness.
If the panel has pre-drilled holes, align them with existing mounting points. Misalignment could indicate a wrong fit or warped metal.
Secure the Panel Permanently
Now that the panel fits correctly, it is time to fasten it permanently.
Welding Techniques for Strength
Start by tack welding every 2–3 inches around the perimeter. This holds the panel in place without causing warping from heat buildup. After tacking, check alignment again and adjust if needed before final welding.
Use short, controlled welds along the seam. Work in alternating sections to manage heat distribution. Overheating causes distortion, especially on thin sheet metal.
Once fully welded, grind down welds with a flap disc for a smooth transition. Feather the edges so they blend into the surrounding metal.
Alternative: Mechanical Fastening
If welding isn’t an option, use self-piercing rivets or sheet metal screws with sealing washers. Drill pilot holes and space fasteners evenly every 1–2 inches. Apply bed liner sealant or butyl tape behind the panel to prevent moisture intrusion.
Pro Tip: Mechanical fastening is less durable than welding and may require resealing over time.
Seal and Finish the Repair

A watertight seal prevents rust and extends the life of your repair.
Apply Rust Inhibitor and Primer
After welding and grinding, clean all metal surfaces with degreaser or wax and grease remover. Spray rust-inhibiting primer on bare steel, especially inside seams and underneath the panel. Let dry completely before proceeding.
Reapply Bed Liner or Paint
If your truck has a spray-on bed liner, mask off surrounding areas and apply a compatible liner product to cover the repair. For painted beds, sand, prime, and paint to match.
Alternatively, install a drop-in bed liner to conceal minor imperfections and protect against future wear.
Common Mistakes to Avoid
Even experienced DIYers make errors that compromise results. Watch out for these pitfalls.
- Skipping surface preparation: Painting or sealing over rust invites rapid deterioration. Always remove all corrosion before installing a new panel.
- Overheating during welding: Too much heat warps thin metal, creating bulges or dips. Use low amperage, short welds, and let the metal cool between passes.
- Ignoring drainage paths: Never block factory drain holes in the bed. These allow water to escape and prevent pooling. Drill new ones if accidentally sealed during repair.
Maintenance Tips After Installation
Preserve your work with regular care.
- Inspect seams annually: Check welds and seams each year for cracks or rust. Touch up primer and reseal as needed.
- Keep the bed clean: Wash out dirt, salt, and debris regularly. Moisture trapped in grime accelerates rust, especially in colder climates.
- Use a bed liner: A liner adds a protective barrier against scratches, dents, and moisture exposure.
Frequently Asked Questions About Truck Bed Repair Panels
How long does it take to install a truck bed repair panel?
Most installations take one to two days, depending on rust severity and welding experience. A straightforward panel swap on a clean bed can be finished in a single afternoon.
Can I install a repair panel without welding?
Yes. Mechanical fastening using self-piercing rivets or sheet metal screws with sealing washers works as an alternative. However, welded panels provide stronger, longer-lasting bonds.
What type of steel is best for repair panels?
E-coated or galvanized steel resists corrosion best. These coatings protect against rust during shipping and extend the panel’s service life once installed.
Do I need to remove the bed liner before repairing?
Yes. Remove any spray-on liner, drop-in mat, or bed rug from the work area. This exposes bare metal for accurate cutting, fitting, and sealing.
How do I prevent rust from returning after repair?
Apply rust-inhibiting primer to all bare metal, seal seams with butyl tape or bed liner sealant, and keep the bed clean. Inspect annually and touch up any chips or exposed areas promptly.
Key Takeaways for Installing Truck Bed Repair Panels
Installing truck bed repair panels is a practical way to extend your truck’s life without breaking the bank. Focus on clean cuts, precise fitment, and solid welds to ensure durability. Once sealed and finished, the repair should blend seamlessly with the rest of the bed, strong enough for daily hauling and tough enough to withstand the elements.
Next step: Measure your damaged area today and order a matching OEM-style panel so you can begin prep work this weekend.