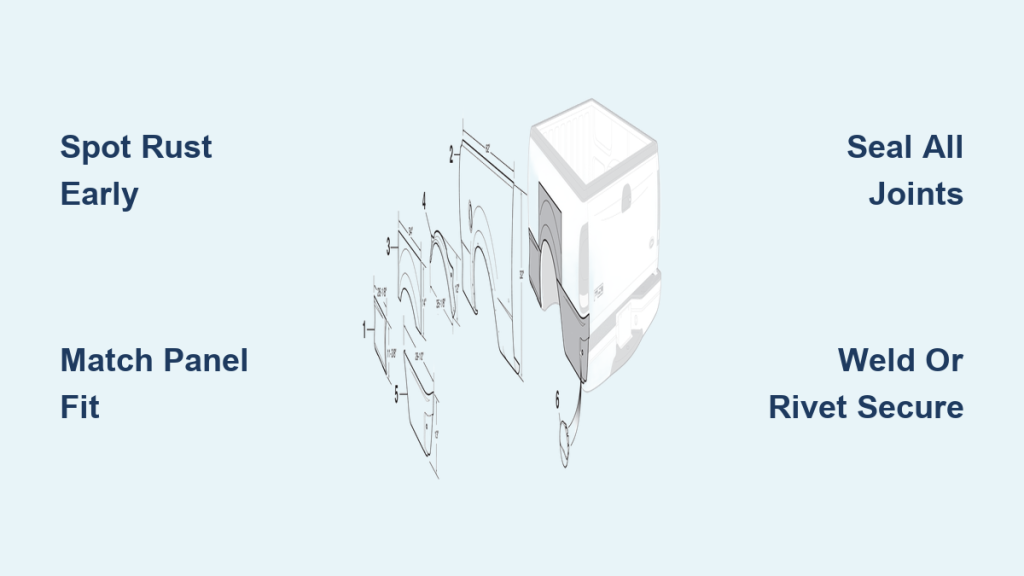
A dented or rusted Ford truck bed can turn a reliable workhorse into an eyesore. Whether you’re dealing with curb rash on the side rails, rust holes near the wheel wells, or a crumpled floor panel, Ford truck bed repair panels offer a practical fix without replacing the entire bed. These panels let you cut out only the damaged section and weld or bolt in a replacement, restoring both function and appearance.
In this guide, you’ll learn how to spot damage early, choose the right panel for your specific Ford model, and complete an installation that holds up to heavy use. We’ll also cover finishing techniques, common mistakes, and when it’s smarter to call a professional.
Spot Truck Bed Damage Before It Spreads

Catching problems early saves hundreds of dollars in eventual repairs. Most bed damage starts small and worsens over time due to moisture, vibration, and load stress.
Look for Early Rust Signs
Rust typically begins where water collects or paint chips. Check inside the wheel wells, along bed seams, and near drain holes for orange staining or bubbling paint. Surface rust can be sanded and treated, but rust that has eaten through the metal requires panel replacement.
Quick Test: Press a magnet against the suspicious area. If it doesn’t stick firmly, the steel has thinned too much for a simple patch.
Examine High-Impact Zones for Dents
Tailgate corners, side rails, and the front bulkhead take the most abuse. Run your hand across these areas to feel for shallow dents that might be hard to see. Pay special attention to stake pockets and tie-down points, where stress cracks often form around mounting holes.
Check Floor Drainage
A properly draining bed prevents water from pooling and accelerating corrosion. Pour a bucket of water into the empty bed and watch how it flows toward the drain holes. Standing water means clogged drains, a sagging floor, or hidden damage beneath the surface.
Choose the Correct Repair Panel for Your Ford

Not every panel fits every truck. Ford has produced several bed styles across different generations, and getting the wrong part wastes time and money.
Match Your Truck’s Exact Specs
The F-150, F-250, and F-350 each have unique bed dimensions. Within those models, bed length and body style vary by year. A 2007 F-150 short bed differs significantly from a 2015 model.
Common Ford Bed Configurations:
– F-150: 5.5 ft, 6.5 ft, or 8 ft lengths
– Super Duty (F-250/F-350): 6.75 ft or 8 ft lengths
– Body Styles: Styleside (smooth sides), Flareside (fender flares), or Styleside with Utili-Track rail system
Always verify your truck’s production year and bed length before ordering.
Decide Between OEM and Aftermarket Panels
OEM Panels come directly from Ford or licensed manufacturers. They match factory dimensions exactly and typically use the same steel thickness as your original bed. The trade-off is cost, often running two to three times more than alternatives.
Aftermarket Panels from brands like Dorman, LMC Truck, or Amermfg offer significant savings. Quality varies, so look for panels made from galvanized or aluminized steel if rust resistance matters. Some cheaper panels may need minor trimming to fit properly.
Pick the Right Panel Section
Repair panels come in several shapes designed for specific bed zones:
- Side panels replace full wall sections damaged by side-impact collisions or deep scratches.
- Corner panels fit the front or rear corners where the bed meets the bulkhead or tailgate area.
- Floor patches cover small rust holes or damaged sections of the bed floor.
- Bulkhead panels replace the wall directly behind the cab, which often gets dented during towing or loading tall cargo.
Prepare Your Workspace and Tools

Good preparation makes the difference between a clean repair and a frustrating weekend. Rushing the setup leads to crooked panels, leaking seams, and wasted material.
Gather What You Need
For a welded installation, you’ll need a reciprocating saw or plasma cutter, a MIG welder with shielding gas, a grinder with cutoff and flap discs, C-clamps, and safety gear including a respirator and welding helmet.
For a bolt-on installation using rivets, swap the welder for a rivet gun and pick up stainless steel rivets, self-tapping screws, and urethane seam sealer.
Cut Out the Damaged Section
Disconnect any wiring for bed lights or sensors before cutting. Mark your cut lines clearly with a soapstone marker, leaving enough margin to reach solid metal on all sides.
Use a metal-cutting blade in your reciprocating saw and keep cuts straight. Stop immediately if you hit unexpected resistance, as you may have reached a structural crossmember or hidden wiring.
Safety Reminder: Metal fragments fly during cutting. Always wear safety glasses and gloves.
Prep the Surrounding Metal
Grind away all paint and rust within a few inches of the repair area. Bare metal is essential for welds to penetrate properly and for sealers to bond. Wipe the area with a wax and grease remover before applying any primer.
Install the New Repair Panel
With prep work done, you’re ready to fit and secure the panel. Take your time here to avoid gaps or weak welds.
Test-Fit First
Set the panel in place without any fasteners. Check that edges align with existing contours and that gaps stay consistent. A gap wider than one-eighth inch will be difficult to seal and will look unprofessional.
Use C-clamps to hold the panel while you check alignment from multiple angles. If the panel rocks or sits unevenly, trim the edges with a grinder until it seats flat.
Choose Your Attachment Method
MIG Welding creates the strongest, most permanent repair. Tack weld every few inches to lock the panel in position, then complete the welds using a stitch pattern. Alternate sides to prevent heat buildup, which warps thin bed steel.
Riveting works well for non-structural patches and for anyone without welding equipment. Drill pilot holes, drive stainless rivets through the overlapping metal, and seal every seam with urethane sealer designed for truck beds.
Seal Every Edge
Moisture is the enemy of any bed repair. Apply a continuous bead of bed sealer along all panel joints, around rivets or bolt heads, and wherever the new metal overlaps the original bed. Smooth the sealer with a plastic spreader and let it cure fully before exposing the bed to water.
Finish the Repair for a Factory Look

A raw metal repair will rust quickly and stand out visually. Finishing the surface protects your work and blends the repair with the rest of the bed.
Sand and Prime
Start with 80-grit sandpaper to level welds and feather paint edges. Work up to 180-grit for a smooth transition between old and new metal. Clean off all dust with a tack cloth, then apply a rust-inhibiting primer to any bare steel.
Paint or Apply Bed Liner
For trucks where appearance matters, spray the repaired area with color-matched paint using your factory code, found on the driver’s door jamb sticker. Blend the new paint into the original finish by feathering clear coat over the edges.
For work trucks or off-road vehicles, a spray-on or roll-on bed liner hides minor imperfections and adds a protective texture. Brands like Line-X, Rhino Linings, and Herculiner offer DIY kits that bond directly to prepared metal.
Avoid These Common Repair Mistakes
Even skilled DIYers can compromise their repair by overlooking key steps.
Treating Only the Obvious Damage
Replacing one rusted panel while ignoring surrounding corrosion leads to repeat failures within a few years. Always treat adjacent metal with rust converter or primer, and inspect the inside of the bed walls where rust often hides.
Over-Welding Thin Steel
Truck bed panels are relatively thin. Long, continuous welds generate enough heat to warp the metal and create stress cracks. Stick to short stitch welds with cooling breaks between passes.
Skipping Seam Sealer
Welds and rivets alone will not keep water out. Even pinhole gaps allow moisture to wick in and start new rust spots behind the repair. Seal every joint thoroughly.
Keep Your Repaired Bed in Good Shape
A few simple habits extend the life of your repair and the rest of the bed.
Wash the Bed Regularly
Road salt, mud, and spilled chemicals all accelerate corrosion. Rinse the bed monthly, or more often in winter climates, and dry it thoroughly when possible.
Inspect Drain Holes Quarterly
Clear leaves, dirt, and debris from the drain holes at each corner of the bed. Standing water in a seemingly dry bed is one of the fastest paths to rust formation.
Use Protective Accessories
A drop-in bed liner or rubber mat cushions cargo and prevents scratches. For trucks with the Utili-Track system, plastic dividers and cargo bars reduce shifting that causes side-wall dents.
Frequently Asked Questions About Ford Truck Bed Repair Panels
How long does it take to install a truck bed repair panel?
For someone with moderate experience, a single panel replacement takes four to eight hours, including prep, cutting, welding, and finishing. First-time repairs may take longer.
Can I install a repair panel without welding?
Yes. Bolt-on and rivet-on patch panels are available for most common repair areas. These kits work best for non-structural patches and require no special equipment beyond a drill and rivet gun.
Will an aftermarket panel match my factory paint?
Color match depends on your specific paint code and the panel’s primer quality. Even with a perfect code, blending new paint with aged factory paint is challenging without professional equipment.
Where do Ford truck beds commonly rust?
The most vulnerable areas are the wheel well lips, bed seams, drain holes, and the front bulkhead where moisture collects against the cab. Regular inspection of these zones catches rust early.
Should I replace the entire bed or just a panel?
Panel replacement makes sense when damage is limited to one or two zones and the rest of the bed is structurally sound. Full bed replacement is rarely cost-effective unless the frame is compromised.
Final Thoughts on Repairing Your Ford Truck Bed
A well-executed Ford truck bed repair panel installation restores strength, stops active rust, and brings damaged sections back to factory appearance. The key to lasting results lies in identifying damage before it spreads, choosing a panel that matches your exact model and year, and sealing every joint against moisture.
If your truck has extensive structural damage or you’re not confident with welding, a professional body shop can handle the work and often warranty the result. For everyone else, a careful DIY repair using quality panels and proper sealing techniques delivers years of reliable service and protects your truck’s resale value.