
That weathered factory steel bed on your classic Chevy just doesn’t cut it anymore. You want the rich character and craftsmanship that only real wood delivers, and frankly, nothing compares to a properly finished oak bed under daylight. Installing a wood bed in a truck restores vintage authenticity while adding personalized style that metal simply cannot match. This guide walks you through every phase, from initial dry-fit layout to final bolt tightening, using proven techniques that produce show-quality results on trucks like the 1952 Chevrolet 3100.
Prepare and Lay Out Wood Boards
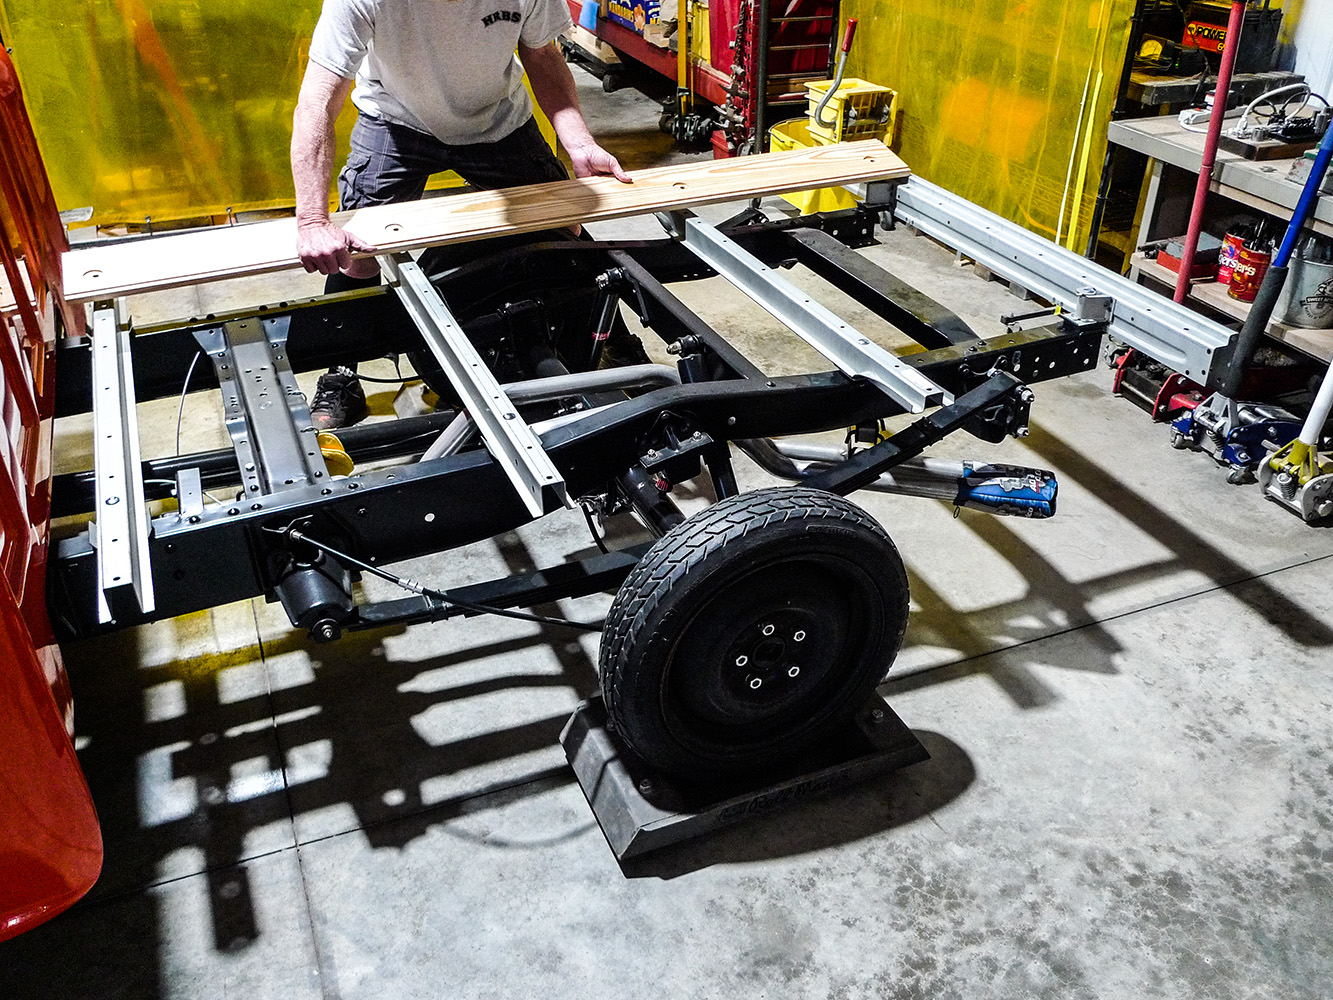
Before drilling any holes or applying finish, dry-fit all boards across your truck bed frame. This critical first step reveals gaps, misalignments, and areas needing trimming. Most installations require shaving roughly 1/4″ off each board to achieve a snug fit inside the metal side rails.
If your design incorporates stainless steel spacing strips, recut the grooves after adjusting board width so the metal sits flush. Once alignment is perfect, disassemble the boards one at a time and label each piece numerically. This simple step prevents confusion during reassembly and helps maintain consistent grain patterns and stain absorption from front to back.
Mark Mounting Hole Locations
With the center boards removed, transfer the frame’s mount points onto the wood. A Stabilo-type water-based grease pencil works perfectly here. It shows up clearly on raw wood and resists smearing during handling.
Position the remaining boards near the side and front panels, then mark where bolts will pass through the frame into the wood. Use a straight edge to draw clean reference lines across multiple boards. Keep your marks light but visible so they guide drilling without damaging the grain structure.
Drill Bed Mount Holes
Drill all required mounting holes before applying any finish. Use a 1/2″ drill bit for the main front and rear cross-sill bolts and a 3/8″ bit for side rail or intermediate support holes. Match bit depth to bolt length to avoid over-penetration through the wood.
For recessed washers, trace the offset washer pattern onto the wood surface now. You will return to cut precise pockets later, but having the outline in place ensures accurate washer orientation.
Cut Washer Recesses Flush
Flush-mounted hardware prevents stress points and creates a clean surface. Use a 1 1/2″ Forstner bit, which produces flat-bottomed holes ideal for washer seating. Set your drill press depth stop to match washer thickness, typically between 1/8″ and 3/16″.
Align the bit with your pre-traced washer outlines. Because offset washers aren’t centered on the bolt hole, marking their arc around the hole makes drilling orientation obvious.
Test Fit Washers and Bolts
Place each washer into its recess and confirm it sits completely flat. Any protrusion means you need to deepen the pocket slightly. Drilling too deep allows wood compression over time, so stay within washer thickness.
Pass a bolt through the hole to verify alignment. Smooth travel confirms clean drilling. Any binding indicates misalignment between the bolt hole and washer recess. Correct this before moving forward.
Sand and Shape Board Edges
With holes drilled and tested, sand every board thoroughly. Focus your work on three areas:
– Smoothing all cut edges
– Rounding top corners slightly for comfort and water runoff
– Removing pencil marks and minor surface flaws
Start with 120-grit paper, then finish with 220-grit for a silky surface that accepts stain evenly. Avoid aggressive sanding near bolt holes, where you can weaken structural integrity.
Fit Cross Bars and Mount Blocks
Test-fit the cross bars, especially the rear bar on half-ton trucks. These typically require wood blocks and rubber pads between the frame and wood bed for vibration damping and proper elevation.
Cut blocks from solid 2″x2″ oak or another durable hardwood. Drill a 1/2″ hole through the center for the mounting bolt. Soak blocks overnight in tung oil or boiled linseed oil to boost rot and moisture resistance.
Place rubber pads under each block at metal contact points to prevent wear and eliminate squeaks.
Stain Wood for Classic Look

Now bring out the wood’s natural beauty. Brush on golden oak stain or your preferred shade in this order:
1. Bottom edges
2. Sides
3. Top surface
This sequence prevents drips from ruining finished areas. Let the stain sit for 5–10 minutes, then wipe off excess with a lint-free cloth. Allow 24 hours of dry time before applying protective oil.
Pro Tip: Never skip wiping excess stain. It leads to sticky, uneven finishes that attract dirt.
Soak Boards in Tung Oil Mix
For long-term protection, soak boards overnight in a 50/50 mix of turpentine and tung oil. This combination thins the oil for deeper wood penetration. Purchase pure tung oil from woodworking suppliers like Woodcraft for best results.
The next day, lay boards flat and apply the same 50/50 mix to the underside first, followed by sides and top. Let it soak for 15–20 minutes, then wipe dry. Repeat for a second coat.
Finish with at least two additional coats of straight tung oil:
– Brush thoroughly into grain and around bolt holes
– Wait one hour between coats
– Final finish should be low-gloss, water-resistant, and smooth
This finish resists UV fading, moisture, and minor scratches. It holds up beautifully on truck beds exposed to sun, rain, and heavy use.
Install Wood Boards in Truck Bed
Start installation with the outermost edge boards. Slide each labeled board under the steel side rails, aligning pre-drilled holes with frame mounts. Insert carriage bolts with heads seated in the offset washers.
Work toward the center while maintaining even spacing with stainless steel strips between boards. These strips serve as spacers and help channel water out of the bed.
Align Front and Rear Mount Bolts
The front mounting bolt passes through several layers:
– Bed sill (inner metal rail)
– Wood block
– Rubber pad
– Top, middle, and bottom frame members
One bolt typically aligns easily using a long Phillips screwdriver through the full stack. The second often requires two people working together:
– One person above guides the bolt
– One underneath uses a pry bar to shift the frame slightly and catch the hole
Warning: Misalignment is common. Rely on patience and leverage rather than force to avoid stripping holes or bending bolts.
Secure All Mounting Points
Each bolt uses this hardware stack:
– Carriage bolt (smooth side against wood)
– Large flat washer
– Lock washer
– Nut (tightened from beneath)
As you move inward, space becomes tight. To simplify the process:
– Use a flexible nut driver with a standard socket
– Pre-load nuts into the driver
– Apply weatherstrip cement to the lock washer to hold it in place while threading
This technique eliminates dropped nuts and speeds assembly, especially at hard-to-reach rear and mid-sill locations.
Final Fit Check and Maintenance Tips
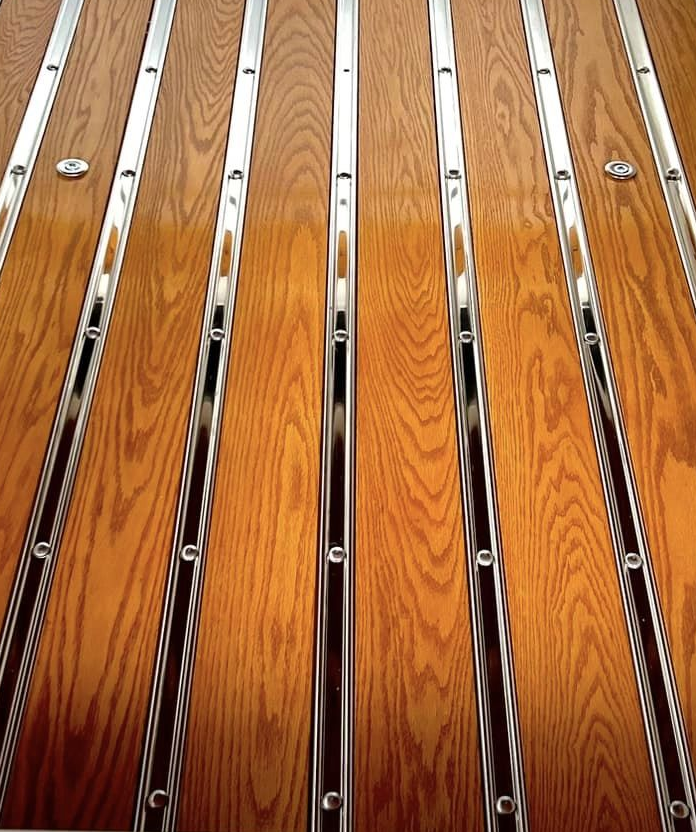
Once all boards are installed and tightened, walk the bed and inspect for:
– Loose boards
– Gaps or uneven spacing
– Protruding hardware
Retighten all nuts after driving 50–100 miles. Wood settles slightly under load and vibration, and this step ensures everything locks down properly.
Prevent Water Damage and Wear
Extend the life of your wood bed with these habits:
– Reapply tung oil annually or as needed
– Replace damaged blocks or pads promptly
– Keep the bed free of standing water
Even sealed finishes suffer under prolonged wet debris exposure. A quick rinse and dry routine keeps the wood looking great for decades.
Upgrade with Stainless Steel Strips
Stainless strips offer more than visual appeal. They:
– Maintain consistent board spacing
– Prevent wood-on-wood friction
– Channel water out of the bed
Confirm they seat fully in routed grooves. Replace any bent or corroded strips during maintenance.
Frequently Asked Questions About Installing a Wood Bed in a Truck
What tools do I need to install a wood bed in a truck?
You need a drill press or hand drill with Forstner bits, standard twist bits in 1/2″ and 3/8″ sizes, sandpaper in 120 and 220 grit, a straight edge, a grease pencil, brushes, and flexible nut drivers. Additional helpful items include pry bars, rubber pads, and weatherstrip cement for hard-to-reach bolts.
How do I protect wood truck bed boards from weather damage?
Apply multiple coats of tung oil, starting with a 50/50 mix of turpentine and tung oil, followed by straight tung oil coats. This finish resists UV fading, moisture, and scratches. Reapply annually and avoid letting standing water collect on the wood surface.
Do I need wood blocks and rubber pads for mounting?
Yes. Wood blocks cut from 2″x2″ oak and rubber pads go between the metal frame and wood bed. These components dampen vibration, prevent metal-on-metal wear, and allow proper elevation of the wood surface above the frame.
Can one person install a wood truck bed alone?
You can complete initial layout, drilling, staining, and oiling solo. However, final bolt installation typically requires two people. One person guides bolts from above while another tightens nuts from below. Reaching cross-sills becomes nearly impossible without a helper.
What is the purpose of stainless steel strips between wood bed boards?
Stainless steel strips maintain even spacing between boards, prevent wood-on-wood friction that causes wear, and channel water out of the bed. They also add visual contrast and a classic appearance that complements the wood grain.
Key Takeaways for a Professional Wood Bed Installation
Installing a wood bed in a truck rewards careful preparation and patience. Start with a thorough dry-fit and label every board to avoid confusion later. Drill precise holes and cut flush washer recesses so hardware sits clean and tight. Finish the wood with golden oak stain followed by multiple tung oil coats for weather resistance that lasts decades.
When installation day arrives, work from the outside in and use flexible nut drivers to reach tight spots. Have a helper ready for the trickiest bolt alignments. After 50–100 miles, retighten everything and plan annual oil refreshes.
Ready to transform your truck? Gather your materials, clear your workspace, and start with the dry-fit. The result is a show-quality wood bed that turns heads and honors classic truck craftsmanship.