
Your truck works hard, hauling gear, tools, or weekend adventure equipment, and the bed takes the brunt of daily wear. Over time, even the toughest spray-on or drop-in bed liners can crack, peel, or develop holes. When damage shows up, you don’t need a full replacement. With the right tools and technique, you can repair your truck bed liner quickly and affordably, restoring protection and keeping rust at bay.
This guide walks you through every step of repairing common bed liner damage, from small chips and scratches to larger cracks and peeling sections. Whether you have a spray-on polyurethane liner or a plastic drop-in mat, we’ll cover how to prep, patch, and seal for lasting results. You’ll also learn how to match textures, prevent future damage, and choose the right repair kit for your truck.
Assess the Damage Before Starting Repairs
Before grabbing tools, inspect your bed liner closely. Different types of damage require different repair methods. Identifying the issue early ensures you use the correct materials and avoid wasted effort.
Check for Cracks and Holes
Look for visible splits, punctures, or gouges in the liner. Small cracks under 1 inch can often be sealed with a liquid patch. Larger holes may need reinforcement with mesh or filler. Tap around the area. If the liner sounds hollow, the bond to the metal may be compromised.
Identify Peeling or Delamination
If the liner is lifting from the truck bed, it’s likely due to poor surface prep during original application or moisture buildup. Gently lift the edge with a plastic scraper. If it pulls away easily, the adhesion has failed. This type of repair requires cleaning, sanding, and re-bonding.
Spot Surface Scratches and Chips
Minor surface damage doesn’t always need structural repair. Light scratches that haven’t penetrated the full thickness can often be sealed with a topcoat. However, if the underlying metal is exposed, immediate repair is critical to prevent rust.
Gather Essential Repair Tools and Materials
Having the right supplies on hand makes the job faster and more effective. Most repairs can be done in a few hours with basic products from an auto parts store or online retailer.
Required Materials for Spray-On Liners
- Sandpaper (80 and 220 grit)
- Isopropyl alcohol (90% or higher)
- Lint-free cloths
- Utility knife
- Fiberglass mesh patch (for holes)
- Bed liner repair kit (spray or brush-on)
- Paint mixer and drill
- Masking tape and plastic sheeting
Tools for Drop-In Liner Repairs
- Replacement section or universal liner
- Measuring tape
- Heavy-duty scissors or jigsaw
- Adhesive for plastic (optional)
- Rubber mallet (for fitting)
Prepare the Damaged Area for Repair
Proper surface preparation is the most critical step in any bed liner repair. Skipping this leads to poor adhesion and premature failure down the road.
Clean Thoroughly With Alcohol
Remove dirt, grease, and wax using isopropyl alcohol. Wipe the entire repair zone and surrounding 2 to 3 inches. Let it dry completely. Any contamination will prevent the new material from bonding properly.
Sand for Maximum Adhesion
Use 80-grit sandpaper to roughen the damaged area and a 2-inch border around it. For peeling edges, sand until the liner feels secure. Follow with 220-grit to smooth the transition. Wipe away dust with a clean cloth before moving on.
Cut Out Loose Material
If the liner is cracked or bubbling, use a utility knife to remove unstable sections. Make clean, straight cuts to create a neat repair zone. Remove all flaking material. Don’t leave weak edges that can peel later.
Patch Holes and Cracks in Bed Liner

Structural damage needs reinforcement to restore durability. A simple topcoat won’t hold up to heavy loads, so you need to build strength back into the surface.
Apply Fiberglass Mesh for Strength
For holes or deep cracks, press a piece of fiberglass mesh into the opening. It acts like rebar in concrete, giving the repair material something to grip. Trim it slightly larger than the hole so it overlaps solid liner.
Use Two-Part Bed Liner Compound
Mix the resin and hardener from your repair kit according to instructions. Apply the first layer with a putty knife, pressing it into the mesh. Let it cure partially, then apply a second coat to level the surface. Work the material firmly to avoid air bubbles.
Smooth the Surface After Curing
Once fully cured (usually 24 hours), lightly sand the patch with 220-grit paper. Blend the edges into the surrounding liner. Wipe clean before applying a topcoat.
Fix Peeling and Bubbling Liner Sections
When the liner lifts from the truck bed, the bond must be restored to prevent rust and further separation.
Inject Adhesive Under the Liner
Use a syringe or caulking gun to apply bed liner adhesive beneath the peeling section. Lift the edge just enough to insert the tip. Slowly inject while pulling the applicator out to distribute the adhesive evenly.
Clamp and Cure Properly
Press the liner firmly into place. Use heavy objects or clamps to hold it down during curing (typically 6 to 12 hours). Avoid loading the truck bed until fully set.
Seal the Edges
Once dry, apply a thin bead of repair compound along the repaired edge. This prevents moisture from getting underneath again.
Resurface With a Matching Topcoat
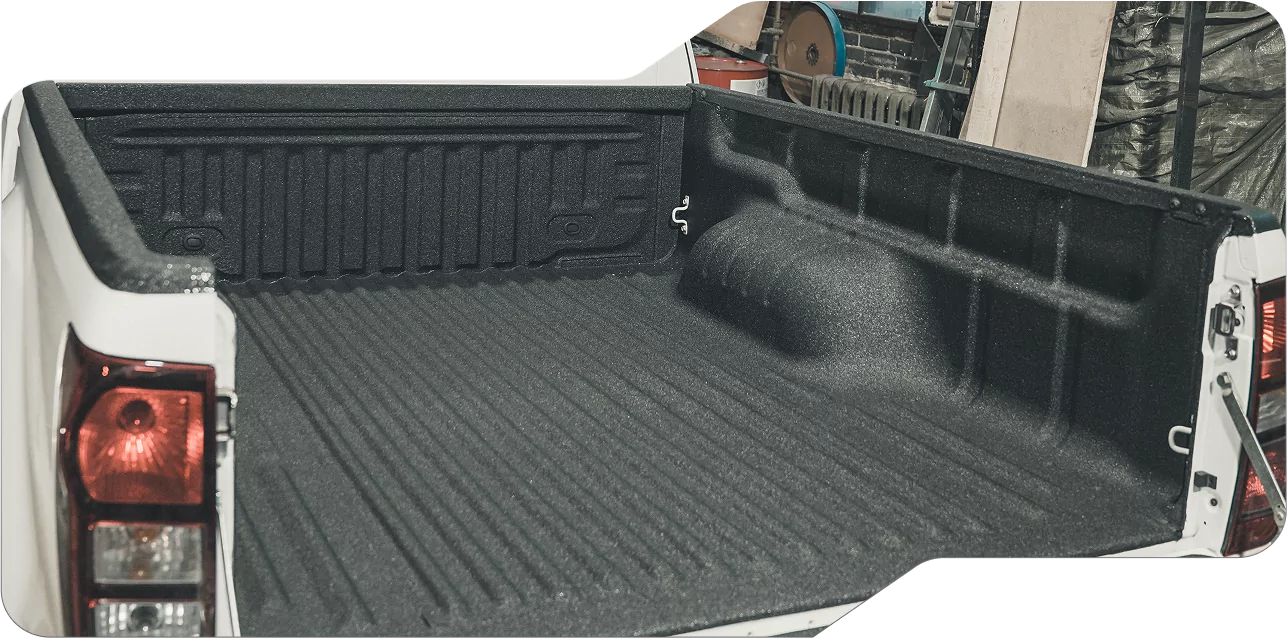
After structural repairs, apply a topcoat to restore protection and appearance.
Choose the Right Repair Kit
Look for kits designed for your liner type (spray-on versus roll-on). Some kits include texture sprayers to match the original finish.
Apply in Thin, Even Coats
Stir (don’t shake) the compound to avoid bubbles. Use a brush or spray applicator to apply a thin layer over the repair and surrounding area. Let it dry, then add a second coat if needed. Build up gradually, as thick layers can sag or crack.
Match the Texture
If your liner has a gritty or dimpled finish, use a textured roller or spray tip. Practice on cardboard first to get the technique right before working on your truck.
Maintain Your Repaired Truck Bed Liner
A successful repair lasts longer with proper care. Prevent future damage with simple habits.
Avoid Sharp Objects
Don’t drag metal tools, lumber with nails, or sharp-edged cargo directly on the liner. Use moving blankets or rubber mats for added protection.
Clean With Mild Soap
Harsh cleaners or pressure washers can degrade the liner over time. Use water and mild detergent with a soft brush. Rinse thoroughly and dry if possible.
Inspect Regularly
Check the repair site every few months. Look for new cracks, lifting, or discoloration. Catching small issues early prevents bigger problems.
Handle Drop-In Liner Repairs
Plastic or rubber drop-in liners are easier to fix but may require different tactics.
Repair Cracks With Plastic Welder
For polyethylene or rubber mats, use a plastic welding kit. Heat the edges and apply filler rod to fuse the material. Let cool completely before use.
Replace Sections If Needed
Some drop-in liners allow modular replacement. Measure the damaged area and order a compatible patch. Trim and snap or glue it into place.
Prevent Movement and Wear
Ensure the liner fits snugly. If it shifts during driving, it can crack at stress points. Use non-slip pads or adhesive strips to keep it in place.
Know When to Seek Professional Help
Some damage is beyond a DIY fix. Recognizing the limits saves time and money.
Extensive Delamination
If large sections of spray-on liner are peeling, the entire bed may need stripping and re-coating. Professionals can sandblast, prime, and reapply for a factory finish.
Rust Under the Liner
If metal is corroding beneath the liner, sand down to bare metal, treat with rust converter, and prime before reapplying liner. Severe rust may require panel replacement.
Warranty Concerns
Some bed liner manufacturers void warranties if repairs aren’t done by certified technicians. Check your warranty before starting any work.
Frequently Asked Questions About Truck Bed Liner Repair
Can I repair a spray-on bed liner myself?
Yes, small cracks, chips, and holes can be repaired with a DIY bed liner repair kit. Proper surface prep is the key to a lasting fix.
How long does bed liner repair take?
Most repairs take 1 to 3 hours of active work, plus 24 hours of curing time before the bed is ready for use.
What is the best product for repairing a truck bed liner?
Two-part polyurethane repair kits designed for spray-on liners work best. For drop-in liners, plastic adhesive or welding kits are ideal.
How do I stop my bed liner from peeling?
Peeling is usually caused by poor adhesion or moisture. Sand the area, clean with alcohol, apply adhesive, and clamp until fully cured.
Can I paint over a damaged bed liner?
You can apply a bed liner topcoat over minor damage, but structural cracks or holes need patching before topcoat application.
How much does professional bed liner repair cost?
Professional repairs range from $200 to $800 depending on damage extent. DIY repairs typically cost under $100 for materials.
Key Takeaways for Repairing Your Truck Bed Liner
Repairing your truck bed liner doesn’t require a full replacement. With proper prep, the right materials, and a little patience, you can restore protection and extend your truck’s life. Focus on adhesion, use quality products, and maintain the surface to keep your bed looking and performing like new. Start by assessing the damage type, gather your tools, and work methodically through each repair step for the best results.