
Installing a BackRack headache rack on your pickup truck while keeping a tonneau cover is a common challenge that thousands of truck owners face. The good news is that BackRack systems are specifically engineered to work with tonneau covers, but only when installed correctly with the right components. Getting this wrong can lead to misalignment, cover interference, or structural failure under load. This guide walks you through every step, from selecting the correct kit and verifying compatibility to mounting the rack, integrating the tonneau, and avoiding common installation pitfalls.
By following this procedure, you’ll learn how to install your BackRack and tonneau cover together seamlessly on Ford F-150, Chevrolet Silverado, or other full-size pickups. Whether you’re working with a folding hard cover, roll-up soft cover, or retractable model, you’ll understand the exact sequence needed for a secure, permanent installation.
Verify BackRack and Tonneau Compatibility

Before touching any tools, you must confirm your vehicle and tonneau cover are compatible with a BackRack installation. Not all kits work with all setups, and using the wrong components can cause fitment failure.
Use the Spec My Back Rack Tool
Visit www.backrack.com and enter your truck make, model, year, bed length, and tonneau cover type. The tool returns exact part numbers and hardware required for your specific application. This step is non-negotiable because BackRack ships two different kits per application, and selecting the wrong one causes fitment problems.
Match Your Tonneau Type to the Right System
Different tonneau cover types require different installation approaches:
- Folding hard covers like Extinct Trifecta and Bakflip work best with the BackRack 5000 Series Tonneau Adaptor Kit
- Soft roll-up covers often rest on the cab bulkhead and may require temporary rack removal or reverse installation
- RetraxPRO or T-slot covers may eliminate the need for a headache rack due to built-in accessory rails
The 5000 Series allows tonneau covers to mount on bed rails rather than the cab wall, eliminating interference with the rack entirely.
Gather Required Tools and Hardware
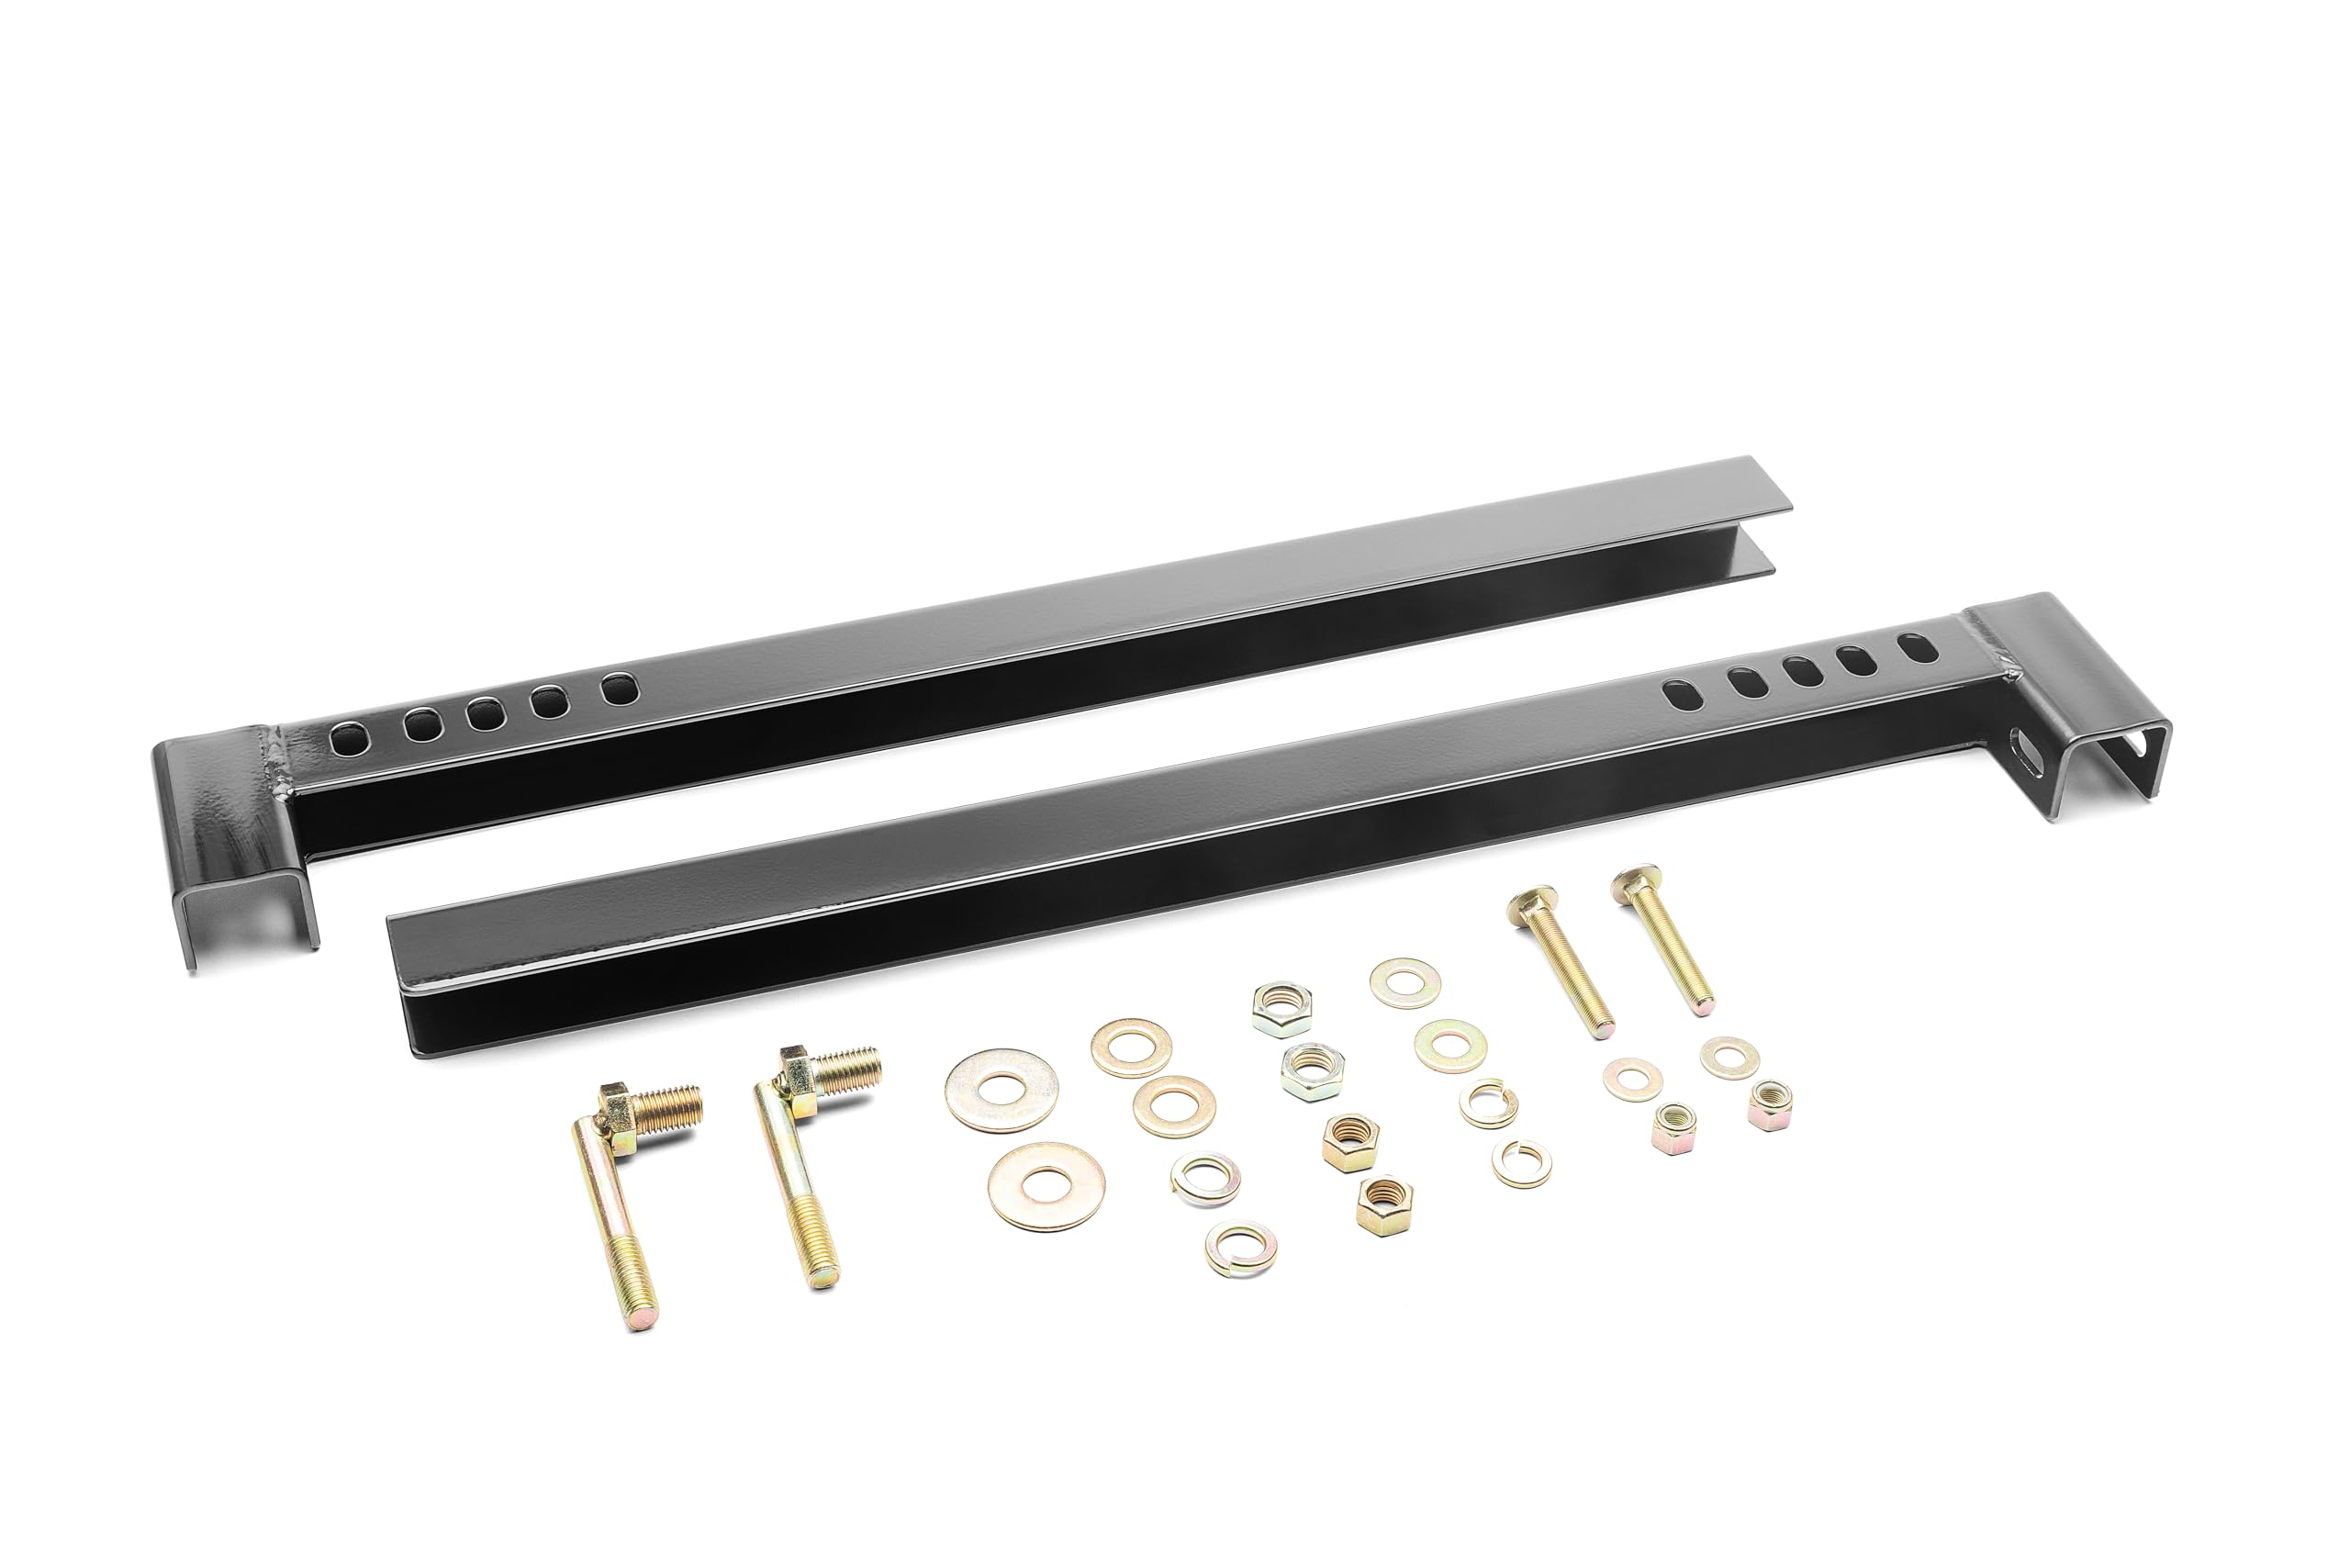
Having the right tools and components on hand prevents mid-installation delays and mistakes. BackRack provides vehicle-specific hardware designed for your exact truck application.
Tools You Will Need
You will need several tools to complete this installation properly. A 3/4-inch socket wrench provides access to stake pockets, while a torque wrench ensures final tightening to specification. A utility knife removes stake pocket covers, and a heat gun or hair dryer activates adhesive pads. Keep a screwdriver or pen handy for guiding bolts through tight access holes, and have a cleaning cloth with degreaser ready for preparing mounting surfaces.
Included Hardware Components
All parts are pre-engineered for your vehicle. Never substitute generic hardware, as this voids the warranty and risks failure during impact.
The stake pocket bolts anchor the rack to your truck frame. U-shaped shim plates stabilize brackets on 6.5-foot and 8-foot beds. Aluminum oval washers align with factory punch marks for structural integrity. Rail spacers elevate the tonneau cover, with the logo facing outward. Nylon lock nuts prevent self-loosening from vibration, and insulating caps prevent galvanic corrosion on aluminum beds. Double-sided adhesive pads dampen noise and protect bed rails.
Prepare the Truck Bed
A clean, properly prepped bed ensures secure mounting and long-term durability. Skipping this step compromises the entire installation.
Clean Mounting Surfaces Thoroughly
Wash and degrease stake pockets, bed rails, and frame access points. Remove wax, oil, and protective coatings that could weaken adhesive bonds. This preparation is critical for the adhesive pads to grip properly.
Remove Stake Pocket Covers
Use a utility knife to cut along the factory seam line of each stake pocket cover. Once cut, the plastic cover pops out easily. Discard or save for potential reinstallation. On 5.5-foot beds, you may need to cut or notch stake pockets for bracket clearance.
Modify Bed Liners if Necessary
Drop-in liners require cutting around stake pockets. Spray-in liners need verification that no material blocks bolt access. BedRug and similar products should be pulled back to expose mounting holes.
Install Stake Pocket Bolts
These bolts anchor the rack to your truck frame, and proper alignment is critical for structural integrity.
Insert the Bolt Assembly Correctly
Disassemble the stake pocket bolt stack by removing the nut, lock washer, and flat washer. Leave the aluminum oval washer on the bolt shaft. Insert the bolt downward through the hole beneath the stake pocket, aligning the oval washer with the factory punch mark on the frame. On the bed side, reinstall the flat washer, lock washer, and nut. Hand-tighten only at this stage.
The oval washer locks into the frame internal structure, preventing rotation and ensuring proper load transfer during impact.
Add Shim Plates When Required
Shims stabilize the rack on longer beds and must be installed correctly for proper support.
Install on 6.5-Foot and 8-Foot Beds
Place the U-shaped shim plate inside the stake pocket and wrap it around the vertical wall. Face the open end outward to ensure bracket stability under heavy use. Skip this step on 5.5-foot bed models, as they do not require shims.
Mount Brackets into Stake Pockets
Now you secure the rack foundation by installing the brackets.
Insert and Rotate Brackets
Slide the bracket into the stake pocket and rotate it inward so the hook engages under the bed rail. Use a screwdriver or pen to guide the front bolt through the access hole. Insert a 3/4-inch socket and hand-tighten the bracket to the truck box. After installing the rear tie-down, retighten the front bolt.
The bracket should be flush, wobble-free, and securely seated before proceeding.
Apply Adhesive Pads and Spacers
These components reduce noise, protect finishes, and ensure smooth integration between the rack and tonneau cover.
Attach Bed Rail Plate Adhesive
Apply double-sided adhesive pads to the underside of bed rail plates. Warm with a heat gun if specified in your instructions. Peel the film and position the plate over the stake pocket bolt with the tapered side facing outward.
Install Rail Spacers
Peel adhesive backing from rail spacers and place them over the bed rail plate and bolt. The BackRack logo must face outward, with the taper pointing toward the rear of the truck.
These adhesive pads prevent vibration noise and protect against metal-on-metal wear.
Assemble and Mount the Headache Rack
Now it is time to lift and secure the rack itself. This step requires assistance due to the weight and size of the assembly.
Pre-Assemble the Rack
Slide brackets into the cab-facing slots on the rack frame. Insert carriage bolts through mounting holes and add flat washers and nylock nuts on the opposite side. Hand-tighten only at this stage.
Two people are needed for this lift to avoid misalignment or injury.
Mount the Rack Assembly
Lift the rack over the rail spacers and set it onto the stake pocket bolts. Center brackets on spacers and insert four 1-inch black carriage bolts through rail-mount slots. Add flat washers and nylock nuts to each. Begin tightening evenly, but leave slightly loose for final alignment.
Center the rack over the rear third brake light for a symmetrical appearance.
Final Tightening and Adjustments
Now you secure everything to manufacturer specifications for long-term durability.
Torque All Bolts to Specification
Use a torque wrench on stake pocket bolts, referring to your instruction manual for exact values. Tighten all carriage bolts and nylock nuts to manufacturer specifications. Recheck tightness after driving 50 miles.
Add Final Components
Attach the BackRack decal to the tailgate-facing surface. Install the protective rubber strip on the bracket to prevent paint damage. Apply the foam strip along the front edge of the bed to fill gaps from bracket thickness.
Verify that the rack is level and centered, the tailgate operates without interference, and all hardware is tight and secure.
Install the Tonneau Cover
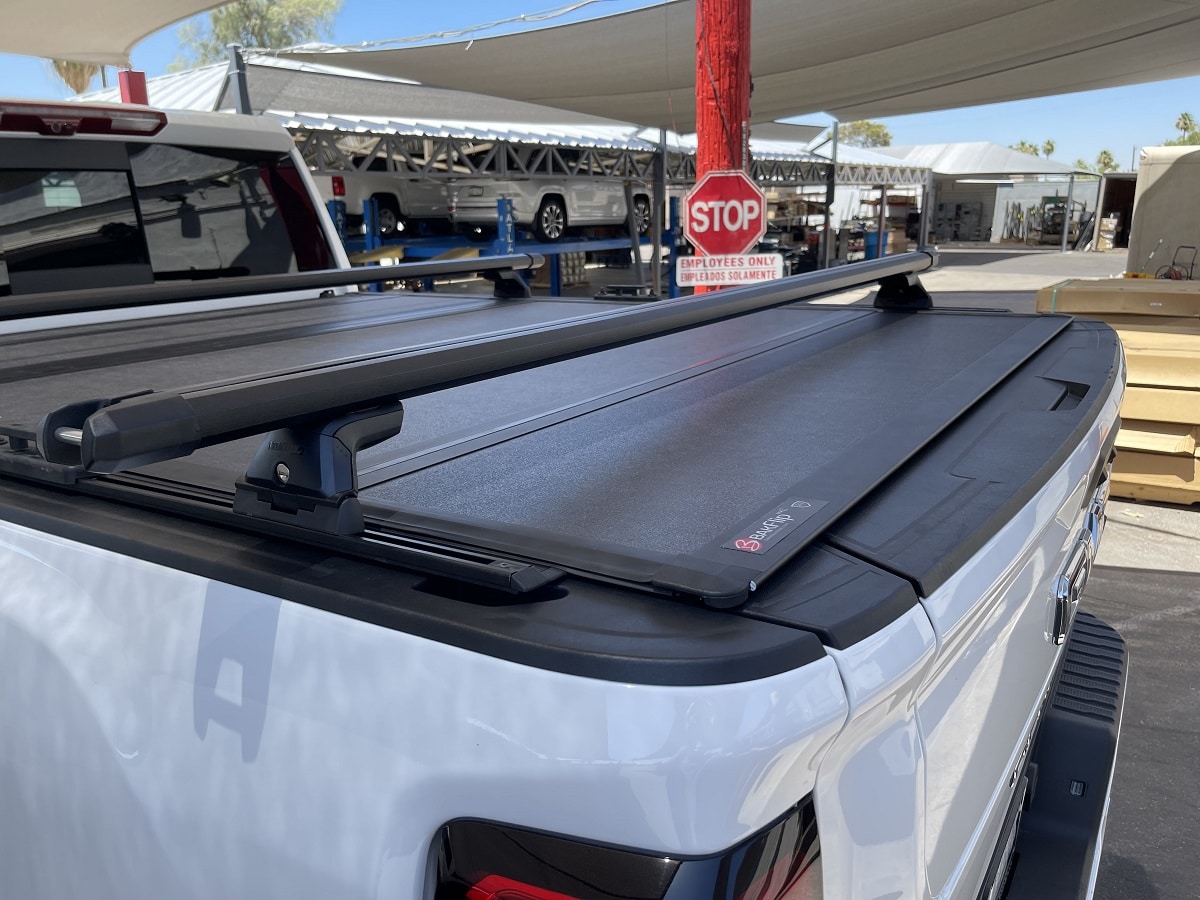
Now integrate your tonneau cover using the method that matches your specific cover type.
For Rail-Mounted Covers
Slide the cover onto the bed rails using factory extending clips for Extinct Trifecta or BackRack-supplied straps for Lund Genesis. The cover rests on rails, not the cab bulkhead, eliminating rack interference. This method provides full bed access without disassembly.
For Bulkhead-Resting Covers
These covers cannot be installed after the rack. Remove the rack temporarily by taking off nuts from stake pocket bolts, lifting off the rack and brackets, installing the tonneau cover, and reinstalling the rack on top.
Use Reverse Installation When Needed
Some tonneau covers must be installed before the rack, requiring a different sequence.
Step-by-Step Reverse Install
Install the tonneau cover first, leaving rails in place. Remove nuts from stake pocket bolts and lift off brackets and rails. Reattach brackets and rack over the installed cover. Tighten all hardware and test cover operation.
This method works with soft roll-up covers and some folding models that slide over the bulkhead.
Install Rear Anchor System
Add stability and tie-down capability with the recommended rear anchor system.
Secure the Rear Hooks
Thread a 3/8-inch by 16 by 2.5-inch full-threaded bolt through the rear hook. Add in order a flat washer, lock washer, and nut. Attach an optional tie-down clip before tightening. On aluminum beds, place an insulating cap on the bolt tip to prevent galvanic corrosion.
This prevents loosening from vibration and protects against metal degradation over time.
Handle Special Vehicle Cases
Some trucks need extra attention due to unique bed constructions or bracket requirements.
Ford F-150 (2015-2016)
The 6.5-foot and 8-foot beds require U-shaped shims. Aluminum beds always need insulating caps. The 5.5-foot bed does not require shims but may need stake pocket modification.
Chevrolet Silverado ZR2
Verify bracket fitment, as the reinforced bed structure may require adjustment. Use C-channel brackets for wider spacing when needed.
Older Model Modifications
Some users order 2015-2016 brackets for better fit on older models like 2014 F-150. This may require drilling new holes or enlarging bracket slots.
Always pre-fit components before final tightening to ensure proper alignment.
Explore Alternative Solutions
If direct integration fails, consider these options.
Use T-Slot Rail Systems
Elevate T-slot rails and racks over Bakflip covers to enable modular hauling of ladders, kayaks, or lumber while maintaining cover functionality.
Choose a Cover with Built-In Accessories
RetraxPRO features T-slots that accept crossbars, lights, or mounts, eliminating the need for a separate headache rack. SD Surfer offers an integrated design that avoids interference.
Select Rack-Compatible Soft Covers
Look for roll-up covers that install before the rack, have removable cab-end sections, or use custom brackets for clearance.
Folding hard covers integrate best with the 5000 Series, while soft covers often need reverse installation.
Maintain Your Installation
Long-term performance depends on regular care and inspection.
Inspection Schedule
Check all bolts for tightness every 3,000 miles or after off-road use. Re-torque if needed and clean adhesive pads and spacers. Replace the foam strip if it becomes compressed.
Durability Notes
The rack is powder-coated steel that resists rust and UV damage. Adhesive pads may degrade in extreme heat or cold, so inspect them annually. The powder coat finish is not covered under warranty.
Warranty and Support
Know your coverage and where to get help if needed.
Warranty Details
BackRack Original and 5000 Series products include a limited lifetime warranty against manufacturing defects. Bracket kits like part number 50123 include a 1-year limited warranty. Exclusions include misuse, overloading, modifications, and powder coat wear. Proof of purchase is required for all claims.
Contact BackRack
Call 1-800-272-5362 or email info@rackwarehouse.com for support. Visit www.backrack.com for video guides, the compatibility checker, and torque specifications.
Frequently Asked Questions About Installing BackRack with Tonneau Cover
Can I install a BackRack with any tonneau cover?
Not all combinations work directly. Folding hard covers like Bakflip integrate best with the 5000 Series Tonneau Adaptor. Soft roll-up covers often require reverse installation or temporary rack removal. Check the BackRack compatibility tool before purchasing.
Do I need the 5000 Series kit for tonneau integration?
The 5000 Series provides the cleanest integration for rail-mounted covers because it allows the tonneau to sit on bed rails rather than the cab bulkhead. The standard kit works for some applications but may require temporary rack removal for bulkhead-resting covers.
How long does the installation take?
The full installation typically takes 2-4 hours for experienced DIYers. First-time installers should budget 4-6 hours. Having a second person available speeds up the rack mounting process significantly.
Will this work on an aluminum bed truck?
Yes, but you must use insulating caps on all bolt tips to prevent galvanic corrosion between steel and aluminum. The BackRack hardware kit includes these caps for aluminum bed applications.
What happens if I skip the shim plates on a longer bed?
Skipping shim plates on 6.5-foot or 8-foot beds causes bracket instability and potential loosening under load. The shims distribute pressure and prevent lateral movement, which is critical for heavy cargo hauling.
Can I still use my bed tie-downs with this installation?
Yes, the rear anchor system includes optional tie-down clips that work with the rack. You can also use factory bed tie-downs, as the rack does not interfere with standard mounting points.
Key Takeaways for Installing BackRack with Tonneau Cover
Installing a BackRack with a tonneau cover is a precision task that is entirely DIY-friendly when you use the correct kit, tools, and sequence. The 5000 Series Tonneau Adaptor Kit delivers the cleanest integration, especially for rail-mounted folding covers, because it allows the tonneau to mount on bed rails instead of the cab wall. For bulkhead-resting covers, reverse installation or temporary rack removal is the only solution.
Always use vehicle-specific hardware, torque all bolts to specification, and protect against corrosion on aluminum beds. When in doubt, consult BackRack support at 1-800-272-5362 or use the online compatibility checker before purchasing. Your safety and your truck integrity depend on getting this installation right.


