
Installing a hard tonneau cover transforms your truck bed into a secure, weather-resistant storage area while improving fuel economy. The hard tri-fold style offers the best balance of durability, full bed access, and value. This guide walks you through every step of the installation process, from gathering tools to testing the final seal.
Prepare Your Tools and Workspace
Before starting, gather all necessary tools to prevent frustration mid-installation. A clean, organized workspace ensures precision and speeds up the entire process.
Essential Tools Checklist
You will need the following items:
- Ratchet and socket set (8mm, 10mm, 13mm) strongly recommended over hand tools
- Adjustable wrench or combination wrenches
- Phillips #2 and flathead screwdrivers
- Tape measure for verifying alignment
- Rubbing alcohol and microfiber towels for surface prep
- Utility knife or razor blade for trimming seals
- Pliers for tightening wing nuts in tight spaces
A power drill with a socket adapter speeds up bolt tightening significantly, especially if you have limited hand strength.
Unpack and Organize Components
Lay out all parts on a clean tarp or your truck tailgate. Typical packages include the pre-assembled tri-fold cover, left and right side rails, six bed clamps, front header seal, rubber bump stops, drain tubes, tension adjusters, lever clamps, and a hardware kit with screws, washers, and wing nuts.
Check each item against the manual parts list. Store small hardware in labeled zip bags to avoid losing anything during installation.
Clean Bed Rails and Apply Header Seal
Dirt, wax, or old adhesive on your truck bed prevents seals and bump stops from bonding properly, leading to leaks and shifting over time.
Wipe Down All Sealing Surfaces
Use a microfiber towel dampened with rubbing alcohol to clean the top edge of both bed rails, the front edge where the header seal attaches, and the rear top corners for bump stops. Scrub firmly to remove grime, grease, and wax, then let the surface dry completely.
Apply the Front Header Seal
Peel the backing off the self-adhesive seal and start at one side, pressing firmly onto the front metal edge of the bed. Work toward the other side while ensuring no air bubbles or wrinkles form. Trim excess with a utility knife flush with the bed molding. Allow 10 to 15 minutes for the adhesive to set before placing the cover.
Do not install the seal over paint or plastic trim. Attach it only to bare metal for proper adhesion.
Install Rubber Bump Stops
Bump stops prevent the cover from hitting your rear window when fully opened. Incorrect placement causes scratches and damage.
Position and Press Into Place
Clean the top rear edge of the bed rail near the tailgate. Place three bump stops: one centered on the fold line and one near each outer corner about a thumbs width from the ends. Press each stop firmly for 10 seconds to ensure strong adhesion.
Install bump stops on the top surface of the rail, not the underside. Wrong placement risks window contact when the cover is fully opened.
Mount Side Rails
Side rails guide the cover and house the clamping system. Proper alignment ensures smooth operation and a watertight seal.
Align and Secure Rails
Orient each rail correctly with the front bracket facing inward toward the cab. Place the rail on top of the bed rail, flush with the top edge, then slide it forward until it touches the cab. Loosen the three bed clamps and tighten them in order: front, then middle, then rear. Repeat for the opposite side.
Use a tape measure to confirm equal distance from the rail edge to the bed edge on both sides. Rails should be parallel and centered.
Snug is sufficient when tightening. Overtightening can dent the bed rail or deform the track.
Assemble and Position the Cover
Now it is time to lift the cover into place. This step requires attention to gap spacing and bolt order.
Attach Cover to Rails
Lift the cover over the rails near the cab and align the rear rubber seal with the front header seal. Maintain a 1/4 inch to 3/8 inch gap between the cover and the cab, consistent across the width. Insert bolts in this order: rubber washer facing up, metal washer, then locking nut. Hand-tighten only at this stage.
Measure from the cover edge to the bed rail on both sides to ensure centering before fully securing.
Install Front Track Clamps
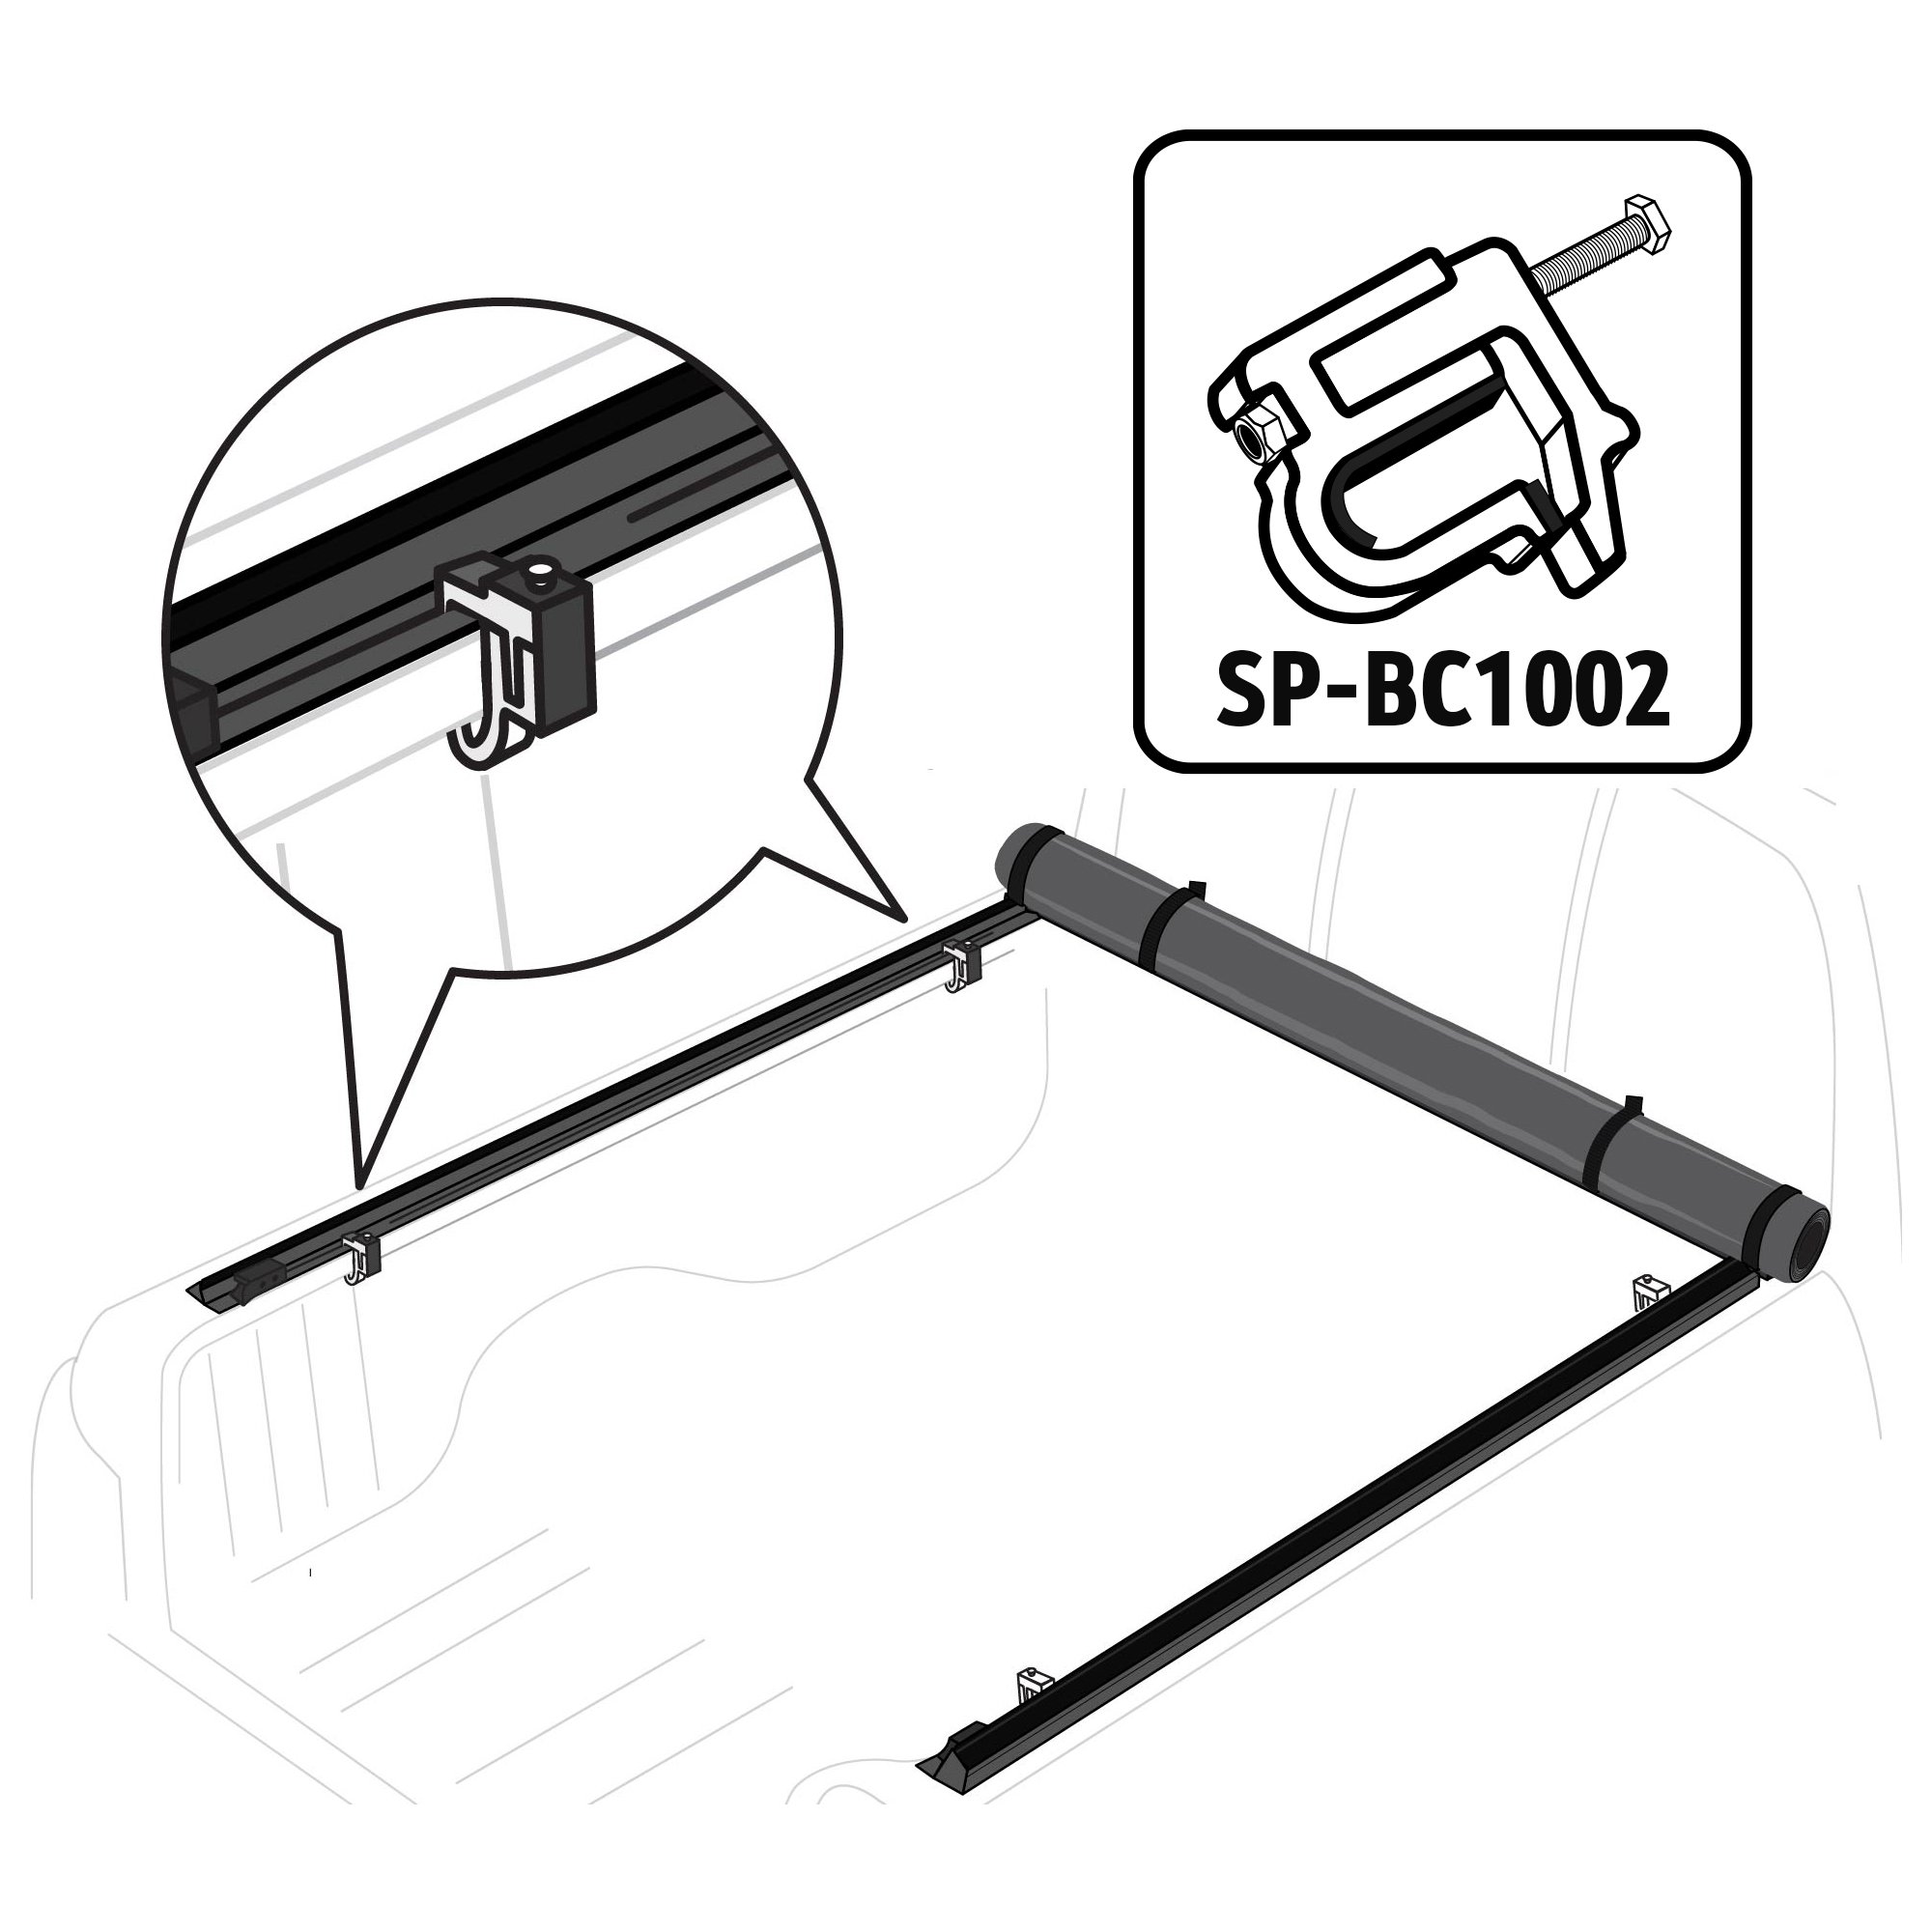
These clamps anchor the cover behind the cab and prevent forward movement during driving.
Secure with Proper Technique
Slide two track clamps behind the cab and insert the triangle-shaped screw upward through the clamp into the bed frame. Pull back plastic molding to access the metal frame. Tighten the top nut securely, then add the wing nut as a jam nut to prevent vibration loosening. Repeat on the other side.
One common mistake is tightening the washer on the bottom instead of the nut on top, which causes the cover to slide. Always tighten the top nut.
Attach Lever-Style Clamps
Lever clamps seal the cover to the side rails. Too tight makes opening difficult. Too loose causes leaks.
Install and Adjust Properly
Thread lever clamps through the cover rail holes and insert into threaded inserts on the side rails. Tighten until the cover is snug but still opens smoothly. Test and adjust iteratively, aiming for firm, even compression with no gaps.
Connect Drain Tubes
Water that enters the side rails must be routed out to prevent pooling and corrosion.
Route Tubes to Factory Drains
Attach the plastic connector to the rubber drain tube and insert it into the front end of each side rail. Route downward to factory drain holes near the cab corners. Let tubes hang freely or tuck into channels. Plug unused ends if required.
Drill 1/8 inch weep holes in rail low spots if water accumulates after testing.
Final Tightening and Testing
With everything aligned, fully secure all hardware and perform comprehensive testing.
Retighten All Connections
Fully tighten all six bed clamps using a ratchet. Recheck side rails for flushness and retighten cover-to-rail bolts. Inspect for even gaps and no twisting.
Loose clamps cause vibration, noise, and potential cover failure at speed.
Validate Performance
Perform a spotlight test by shining light inside the bed at night while a partner checks for escaping light. Use a garden hose to simulate rain and check for leaks at front, sides, and rails. Drive at 60 plus mph to assess noise, vibration, and aerodynamic stability.
One user drove 40 miles at 60 mph after fixing clamp errors and reported zero noise or leaks.
Troubleshoot Common Installation Issues
Even careful installs can encounter problems. Here is how to fix the most frequent issues.
Cover Slides or Shifts
Cause: Loose clamps or incorrect tightening. Fix by tightening the top nut and using the wing nut as a jam nut.
Water Leaks at Front
Cause: Misaligned or poorly applied header seal. Fix by reapplying the seal with full contact and no gaps.
Hard to Open
Cause: Over-tightened lever clamps. Fix by loosening slightly. The cover should open with one hand.
Rattling or Whistling
Cause: Loose hardware or poor seal contact. Fix by retightening bolts, reseating seals, and applying silicone spray to rubber.
Maintain Your Cover for Longevity
A hard tri-fold cover lasts a lifetime with minimal care.
Maintenance Schedule
Clean the cover and seals monthly using mild soap and water with a soft cloth. Inspect clamps and screws every three to six months and retighten if loose. Lubricate hinges and latches every six months using silicone spray only. Clean drain tubes quarterly to prevent clogs from leaves or debris. Reapply silicone protectant annually to prevent seal cracking. Check bump stop adhesion annually and re-glue if peeling.
Frequently Asked Questions About Installing Hard Tonneau Covers
How long does it take to install a hard tri-fold tonneau cover?
Experienced DIYers typically complete the installation in about two hours. First-time installers should plan for three to four hours, especially without prior experience or video guidance.
Do I need to drill into my truck bed?
No. Hard tri-fold covers use bed clamps that clamp onto the existing bed rails without drilling. This preserves your truck warranty and allows for removal if needed.
Will installing a tonneau cover void my truck warranty?
No. Installing a hard tonneau cover does not void the factory warranty for most vehicles. The cover attaches to existing mounting points without modifications to the trucks structure.
How do I know if my cover is sealed properly?
Perform a spotlight test at night by shining a light inside the bed while a partner checks outside for light escaping through gaps. Alternatively, use a garden hose to spray water and check for leaks at the front header seal, side rails, and corners.
Can I open the cover with the tailgate closed?
Yes. The hard tri-fold design allows full bed access even with the tailgate closed. You can access the entire bed length without opening the tailgate.
What causes wind noise after installation?
Wind noise usually comes from loose hardware, poor seal contact, or improper alignment. Retighten all bolts, reseat seals, and apply silicone spray to rubber components to eliminate rattling or whistling sounds.
Key Takeaways for Installing Your Hard Tonneau Cover
Installing a hard tonneau cover requires careful preparation, proper tool selection, and attention to sealing details. The most critical steps are cleaning all surfaces thoroughly before applying seals, maintaining consistent gap spacing between the cover and cab, and tightening clamps in the correct order. Always tighten the top nut on track clamps, not the bottom washer, to prevent the cover from sliding during driving. Test seal integrity with a spotlight or water spray before relying on the cover for cargo protection. With proper installation, your hard tri-fold cover will provide years of security, improved fuel economy, and weather-resistant storage for your truck bed.


