
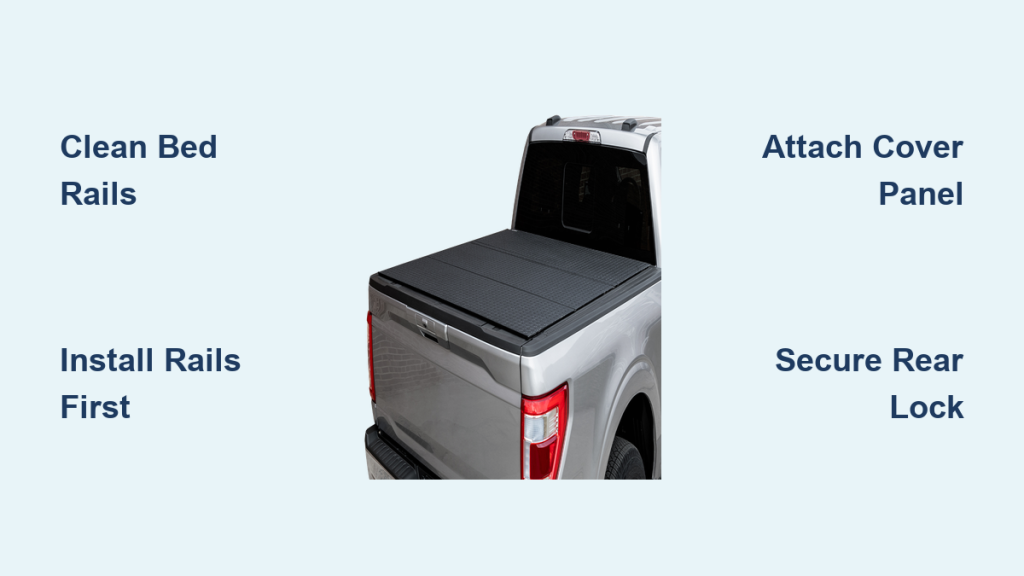
Installing a Lomax Hard Tri-Fold Tonneau Cover transforms your truck bed into a sleek, weather-resistant cargo space without requiring any drilling or permanent modifications. Manufactured by Agri-Cover, Inc., this cover features a drill-free clamp-on system, tool-free cover attachment, and a low-profile finish that enhances both function and style. Whether you drive a Chevrolet Silverado, Toyota Tacoma, Ford Ranger, or Honda Ridgeline, this guide walks you through every phase of installation based on official instructions and real-world user insights.
You will need just one primary tool, approximately 30 to 60 minutes, and no permanent modifications to your truck. Let us walk you through the complete installation process from preparation to final testing.
What You Need Before Installing Your Lomax Cover
Before beginning installation, gather all components and tools to ensure a smooth process.
Components Included in Your Lomax Package
Your Lomax tonneau cover ships with everything needed for installation. The package contains a pre-assembled tri-fold panel made from impact-resistant composite material, two side mounting rails with integrated continuous rubber seals, and eight under-bed clamps (four per side). Also included are front safety clips, security straps with quick-release buckles, spring-loaded front locks, and installation hardware. If you purchased the LOMAX STANCE model, the package additionally includes two magnetic anchor mounts with pre-applied 3M VHB tape and an adhesive promoter wipe for roof surface preparation.
Tools Required for Installation
The Lomax system is designed for simple single-tool installation. You will need a socket wrench with a 10mm or 13mm socket, or a 1/2-inch wrench, to tighten all clamp bolts. While not strictly required, a torque wrench set to 20 foot-pounds ensures precise and safe clamp tightening. Additional recommended tools include spring clamps or vice grips for temporarily securing rails during alignment, a level to verify rail parallelism, a clean cloth, and isopropyl alcohol for preparing roof surfaces on STANCE models.
Prepare Your Truck Bed for Installation
Proper preparation of your truck bed ensures a clean, secure fit for your new tonneau cover.
Clean Bed Rails and Verify Fit
Wipe down the top inside edge of both bed rails with a clean cloth and mild cleaner to remove dirt, wax, or grime that could interfere with seal contact. Confirm your Lomax model matches your exact year, make, model, and bed length using the Shop by Truck tool at Agri-Cover.com or MidwestAftermarket.com. Inspect the bed for obstructions such as bed liners, tie-downs, stake pockets, or RamBox systems that could interfere with clamp placement.
On trucks with composite beds such as the GM CarbonPro, use specialized clamps (Instruction 2000305) to prevent slippage and ensure secure grip. If installing the LOMAX STANCE model, also clean the roof area above the windshield where magnetic anchors will adhere.
Install the Side Mounting Rails Correctly
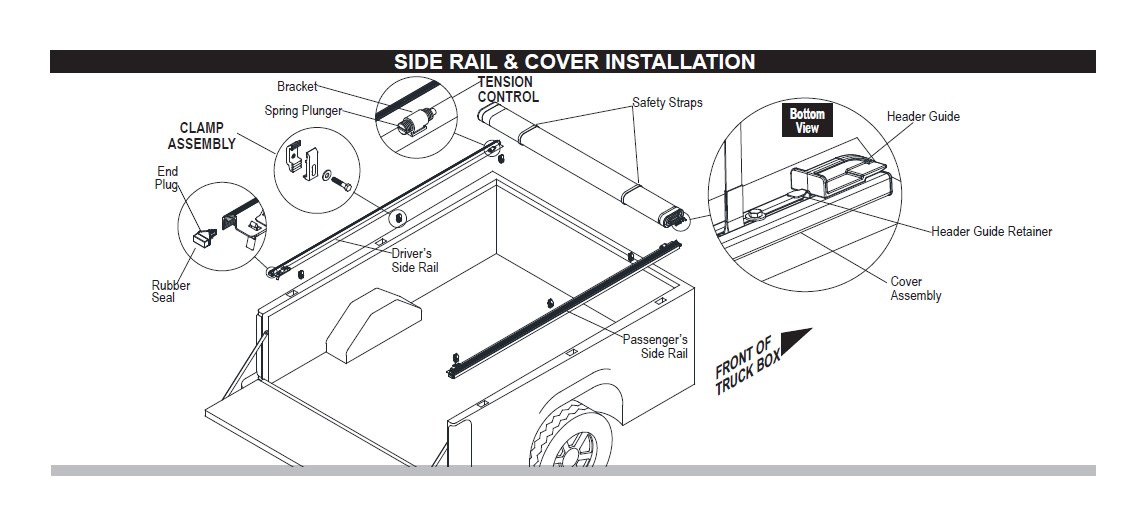
The side rails form the foundation of your Lomax system and must be installed precisely for optimal performance.
Position Clamps on Double-Layer Metal
Each rail uses four under-bed clamps for a total of eight. Clamps should engage areas where the bed has double-layer steel for maximum strength and durability. While installation manuals suggest placing the front clamp at the very front corner, experienced installers recommend moving it slightly inward to avoid weak single-layer corners and engage two layers of metal for improved long-term hold.
Install Rails in the Correct Sequence
Follow this step-by-step process for proper rail installation:
- Place each rail along the top inside edge of the bed rail, ensuring the front catch (hook mechanism) faces toward the cab and the integrated rubber seal presses firmly against the rail.
- Insert clamps from underneath the bed, threading them up through the access holes.
- Temporarily secure rails with spring clamps or vice grips if working alone.
- Begin tightening in this order: front clamp first (closest to the cab), middle clamps second (evenly spaced), and rear clamp last (just ahead of the tailgate).
- Verify rails are level and parallel with equal spacing across the bed width.
Torque Clamps to Specification
Use a torque wrench set to 20 foot-pounds to tighten all eight clamps. This prevents over-tightening, which can damage clamp teeth or bed rails. After tightening, verify that front catches are aligned and facing forward. Re-torque clamps after 50 miles of driving due to vibration settling.
Attach the Tri-Fold Cover Panel
Once the rails are secure, attaching the cover is fast and requires no tools.
Hook Front Edge Into Place
Lift the pre-assembled tri-fold panel and position it over the bed at a slight angle. Align the hooks on the front bottom edge with the front catches on the rails. Slide the hooks under the catches, then lower the cover until it clicks into place, engaging the spring-loaded front locks automatically.
Test engagement by attempting to lift the front edge. You should feel zero movement. If the cover lifts, realign and reseat the hooks properly.
Secure Rear Panel and Test Operation
With the cover mounted, test its operation and secure it for driving.
Snap Rear Panel and Inspect Fit
Open the cover and fold it toward the cab. Snap the rear panel into the tailgate-side rail. Close fully and inspect for flush fit along all edges, no binding during folding or unfolding, and weather stripping making full contact. Attach included security straps at the first fold point (nearest the cab) to prevent wind lift at highway speeds. The straps connect via quick-release buckles and require no tools.
You will hear an audible click when front locks fully engage.
Install STANCE Magnetic Anchors (If Applicable)
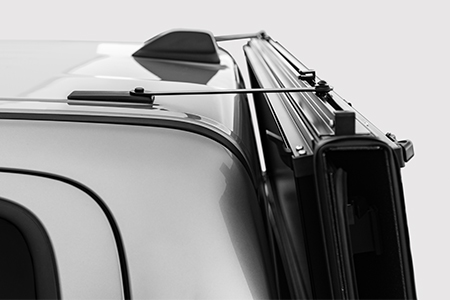
If you own the LOMAX STANCE model, this step allows the cover to lock upright when folded.
Prepare Roof Surface for Adhesion
Clean the roof above the windshield with isopropyl alcohol. Wipe with the included adhesive promoter to enhance 3M VHB tape bonding. Peel the backing off the magnetic anchor mounts.
Mount Anchors Firmly
Press each anchor onto the roof where the folded cover will rest vertically. Hold firm pressure for 30 seconds per anchor. Allow 24 hours for full adhesive cure before regular use.
Some users install anchors on roof racks such as Westcott Design to avoid permanent roof adhesion. Use the Anchor Removal Kit (sold separately) to safely detach mounts without damaging paint if needed.
Verify Compatibility with Your Vehicle
Before finalizing installation, confirm no interference with factory systems.
Check Factory Features
The Lomax does not interfere with power tailgate operation, and bed lights and tie-downs remain fully accessible. However, the LOMAX STANCE model blocks the digital rearview mirror camera when folded on 2024 Toyota Tacoma and similar models. Ensure anchor placement avoids obstructions such as roof racks or sunroofs.
Delay STANCE anchor installation if you plan to add a roof rack, or leave the cover folded down when camera use is needed.
Troubleshoot Common Installation Issues

Even with precise installation, minor adjustments may be needed.
Fix Front Corner Gaps
Some users report small gaps at front corners that could allow water seepage. Apply supplemental gasket tape (such as 3M Black Butyl Tape) along the front seal edge. Test the seal by spraying water around edges during a test shower.
Adjust Rail Alignment
If the cover binds when folding, loosen clamps slightly and realign rails for perfect parallelism. Re-torque to 20 foot-pounds. Use a level placed across both rails to confirm even height.
Remove and Reinstall the Cover
One of Lomax biggest advantages is quick removal and reinstallation.
Remove in Under 30 Seconds
Unlatch the front spring locks by pulling the release tab if equipped. Lift the entire panel straight up and off the rails. Store folded in your garage or secure inside the bed using MOLLE panels or tie-downs.
Reinstall Without Tools
Simply hook and click the cover back into place. No tools are required for reinstallation, making it ideal for hauling large items or weekend adventures.
Maintain Your Lomax Cover Long-Term
Long-term performance depends on routine care and inspection.
Clean Safely
Wash the cover with mild soap and water. Avoid harsh chemicals, abrasives, or pressure washers that may damage the finish or seals. Wipe down rails and clamps periodically to prevent salt and grime buildup.
Inspect Regularly
Check clamp tightness every three to six months and re-torque if needed. Inspect seals for cracks, tears, or compression. Test latch operation after off-road use. Replacement seals are available through Midwest Aftermarket or authorized dealers using specific instruction numbers for edge seals, front seals, and rear seals.
Frequently Asked Questions About Installing a Lomax Tonneau Cover
How long does it take to install a Lomax tonneau cover?
Most first-time users complete installation in 30 to 60 minutes. Experienced installers may finish in as little as 30 minutes. Plan for up to 90 minutes if it is your first time or if working alone.
Do I need to drill holes to install the Lomax cover?
No, the Lomax uses a fully clamp-on system that requires no drilling. The installation is completely reversible and does not modify your truck bed.
Can I install the Lomax cover by myself?
Yes, one person can complete the installation. However, having a second person helps with lifting the tri-fold panel and aligning rails during the process.
Will the Lomax cover work with my power tailgate?
Yes, the Lomax is fully compatible with power tailgate systems. It does not interfere with tailgate operation in any way.
Does the STANCE model block my rearview camera?
Yes, when the LOMAX STANCE cover is folded upright, it blocks the digital rearview mirror camera on some models including the 2024 Toyota Tacoma. Delay anchor installation if you rely on this feature, or leave the cover folded down when using the camera.
Key Takeaways for Installing Your Lomax Tonneau Cover
The Lomax Hard Tri-Fold Tonneau Cover delivers a 30-minute drill-free installation, tool-free removal and reinstallation, superior weather resistance with continuous rubber stripping, enhanced truck aesthetics with a flush low-profile look, and full compatibility with factory features including power tailgates. Use a torque wrench set to 20 foot-pounds for proper clamp tightening and re-torque after 50 miles. For the STANCE model, allow 24 hours for adhesive cure before regular use and consider roof rack mounting to avoid permanent roof adhesion. Apply supplemental gasket tape at front corners if you notice any gaps after installation.
Now that your Lomax is installed, enjoy a cleaner, more secure truck bed and a vehicle that looks complete. Visit MidwestAfthm.com for model-specific instruction manuals or watch official installation videos on the Agri-Cover YouTube channel for additional guidance.


