You just unboxed a shiny new TRUKD V1 bed rack, and you’re itching to mount it on your truck. The timing is perfect because a quality bed rack turns your pickup into a true adventure machine, ready for rooftop tents, kayaks, bikes, and overlanding gear. Learning how to install a truck bed rack properly is easier than most people think. With basic hand tools and a clear sequence, you can mount the TRUKD V1 in just a few hours and hit the road with confidence.
This guide covers every phase of the TRUKD V1 installation, from unboxing to the final torque check. You’ll learn how to align brackets, secure cross bars, and avoid common mistakes that lead to wobble or rust. Let’s get that rack mounted and ready for your next trip.
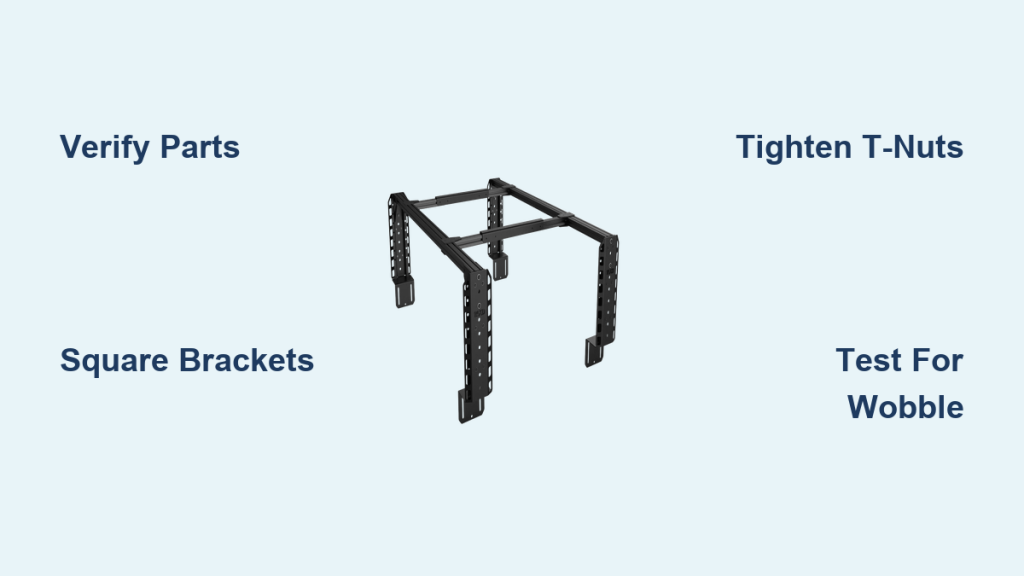
Unpack and Verify All Components
Check Every Included Part
Lay out all parts on a clean surface and confirm quantities based on your rack size:
- 4 corner brackets
- 4 faceplates
- 4 bar ends
- 4 angle brackets (XL models only)
- 4 bed clamps or utility rail nuts
- 8 or 16 (XL) 1/4-20 screws with lock washers and flat washers
- 4 or 8 (XL) 5/16-18 screws with lock washers and flat washers
- 16 or 24 (XL) T-nuts and screws
- 8 3/8-16 screws with lock washers and flat washers
- 4 or 8 (XL) plastic shoulder bushings
- 4 or 8 (XL) thumbscrews (if ordered)
- 1 tube of removable blue thread locker
If anything is missing or damaged, contact TRUKD with photos before moving forward.
Gather Your Tools
You will need:
- Measuring tape
- Four sizes of hex drivers
- Anti-seize grease (strongly recommended)
- Torque wrench (ideal for tightening 3/8-16 bolts)
Skip the power tools. Hand tools give you better control and prevent over-tightening, which can strip threads or damage components.
Attach Bar Ends to the Cross Bars
Slide T-Nuts Into Each Cross Bar
Take each aluminum cross bar and slide 4 T-nuts into the extrusion channels. Position each bar end so its outer face sits roughly ¼ inch from the end of the bar. Insert the provided screws through the bar end into the T-nuts.
Add one drop of blue thread locker to each screw before driving it in. Snug the screws down, but don’t fully tighten yet. Final alignment happens later. Make sure each T-nut rotates freely so it can grip the inside of the T-slot.
Pro Tip: T-nuts should sit flat and turn smoothly inside the channel. If they bind or stick, reposition them.
XL Models: Add the Angle Brackets
For XL racks, attach angle brackets to both ends of each cross bar using the extra T-nuts. Line up the bracket face flush with the cross bar edge and loosely secure with screws. These brackets connect to lower mounting points later.
Secure Faceplates to the Corner Brackets
Fasten with 1/4-20 Screws
Using the 1/4-20 screws, attach each faceplate to its matching corner bracket. From the outside, the hardware order should be: screw head → lock washer → flat washer.
Apply anti-seize grease to the threads before inserting. This prevents corrosion and makes future removal easier. Tighten these fasteners fully now because they won’t be adjusted later.
Note: Skip this step if you’re installing accessory panels. You’ll mount those panels directly to the brackets instead.
Mount the Brackets to Your Truck Bed

Choose Your Mounting Method
Decide between bed clamps or utility rail nuts based on your truck model. Either way, remove your tonneau cover before you begin.
Place each bracket at a bed corner with the outer edge aligned to the top surface. Use the 3/8-16 screws, lock washers, and flat washers to fasten the bracket base to the mounting hardware. Add one drop of thread locker per bolt and tighten loosely so you can adjust alignment.
Square Up the Brackets
With all four brackets loosely mounted, measure diagonally from front to back across opposite corners. The two measurements should match, confirming the rack sits square.
Have a helper hold brackets steady while you fine-tune positions. Once aligned, fully tighten all 3/8-16 bolts.
Important: If using bed clamps, do not exceed 15 ft-lbs of torque. Snug is enough. Over-tightening damages the truck bed rails.
Reinstall your tonneau cover now if applicable. Make sure it seals properly around the new brackets.
Optional: Install Accessory Panels Before Cross Bars
Mount Panels to the Brackets
If you’re adding side or front accessory panels, this is the moment. Have a helper hold each panel in position while you secure it to the brackets using the leftover 1/4-20 screws.
The bracket slots allow flexible positioning. You can raise, lower, or angle panels to suit your gear. Just make sure the left and right sides match for a balanced look.
Tighten all screws securely, but avoid distorting the panel shape.
Install the Cross Bars
Drop Bars Into the Brackets
With brackets secured, carefully lift each cross bar (already fitted with bar ends) and place it into the pocket of the corner brackets. The bar should slide in smoothly without resistance.
If it doesn’t fit:
- Recheck bracket alignment
- Confirm brackets sit flat on the bed edge
- Check for debris or misaligned hardware blocking the slot
Lock Bars with 5/16-18 Bolts or Thumbscrews
Use 5/16-18 screws, lock washers, and flat washers to fasten the bar ends to the brackets. If you have thumbscrews, pair them with plastic shoulder bushings for tool-free removal.
Add one drop of thread locker per fastener and tighten securely.
XL Models: Now attach the angle brackets to the lower mounting points on the corner brackets. You may need to loosen the T-nuts on the cross bar to adjust the angle bracket into position, then re-tighten.
Final Tightening and Stability Check
Go Over Every Fastener
Walk around the rack and check every screw and bolt:
- Cross bar to bar end
- Bar end to bracket
- Bracket to truck bed
- Angle brackets (if XL)
- Accessory panels (if installed)
Pay special attention to the T-nuts inside the aluminum cross bars. When properly tightened, they bite into the soft aluminum and lock in place with zero movement.
Test for Wobble
Push firmly on each corner of the rack. There should be no play or shifting. If you notice movement:
- Check that brackets sit flat on the bed edge
- Re-torque the bed mount bolts
- Confirm T-nuts are seated and tight
Excessive movement causes metal-on-metal contact, which wears through the powder coat and opens the door to rust.
If issues persist, contact TRUKD before driving. Never hit the road with a loose rack.
Protect and Maintain Your Truck Bed Rack
Repair Scratches Right Away
Even small scratches expose bare steel. Use black Plastidip spray to seal any damaged spots. It matches the TRUKD powder coat closely and prevents rust.
Apply in a ventilated area, clean the spot first, and let it dry fully.
Routine Maintenance Tips
- Inspect bolts every 500 miles or after off-road trips
- Reapply thread locker if screws loosen
- Clean with mild soap and water (avoid pressure washers near joints)
- Lubricate screws annually with anti-seize grease
This simple routine keeps your rack strong and corrosion-free for years.
Warranty and Support Details
Know What Is Covered
TRUKD offers a lifetime warranty against manufacturer defects. The powder coat is covered for 2 years from purchase. If parts arrive damaged or the coating flakes, report it within 30 days with photos and TRUKD will send free replacement parts.
Normal wear and tear isn’t covered, but TRUKD stands behind their U.S.-made quality.
Frequently Asked Questions About Truck Bed Rack Installation
How long does it take to install a truck bed rack?
Most installations take 2 to 4 hours depending on experience and whether you’re adding accessory panels. Having a helper speeds things up significantly.
Can I use power tools to install the TRUKD V1?
No. TRUKD recommends hand tools only. Power tools can over-tighten fasteners, strip threads, and damage components. A torque wrench works best for the 3/8-16 bed mount bolts.
What torque should I use on bed clamp bolts?
When using bed clamps, tighten the 3/8-16 bolts to no more than 15 ft-lbs. Going beyond this can damage your truck bed rails.
Do I need to remove my tonneau cover?
Yes. Remove the tonneau cover before mounting the brackets, then reinstall it once the brackets are aligned and tightened. This ensures a proper seal.
How do I know my brackets are aligned correctly?
Measure diagonally from front to back across opposite corners. If both measurements match, the rack is square. Adjust bracket positions before final tightening.
What should I do if my rack wobbles after installation?
Stop and recheck every fastener. Push on each corner and look for play. Tighten T-nuts, bed mount bolts, and bar end screws. If wobble continues, contact TRUKD before driving.
Key Takeaways for Installing Your TRUKD Truck Bed Rack
Installing the TRUKD V1 bed rack is a straightforward DIY project when you follow a clear sequence. Always verify components first, mount brackets square to the truck bed, and tighten T-nuts carefully so they bite into the aluminum cross bars. Use hand tools, apply thread locker and grease where directed, and finish with a full stability check before loading gear.
Your next step is simple: lay out your parts, grab a friend to help with alignment, and set aside an afternoon. Once installed, you’ll have a rugged, USA-built rack ready for rooftop tents, lights, and every adventure on your list. Hit the trails with confidence, and tag TRUKD in your first trip photos.