Thinking about coating your daily driver or work truck with truck bed liner paint? You’re not alone. This rugged, utilitarian finish has exploded from truck beds into full-vehicle applications, prized for surviving rocks, salt, UV rays, and everything the road throws at it. The appeal is real: unmatched durability, corrosion sealing, and a tough-as-nails aesthetic. But the commitment is equally real. Once bed liner paint goes on a car, removing it requires sandblasting, harsh chemicals, or grinding—often damaging the surface underneath. This guide breaks down top products, prep essentials, application methods, real-world results, costs, and honest alternatives so you can make a confident decision.
Choose the Right Bed Liner Product for Your Build
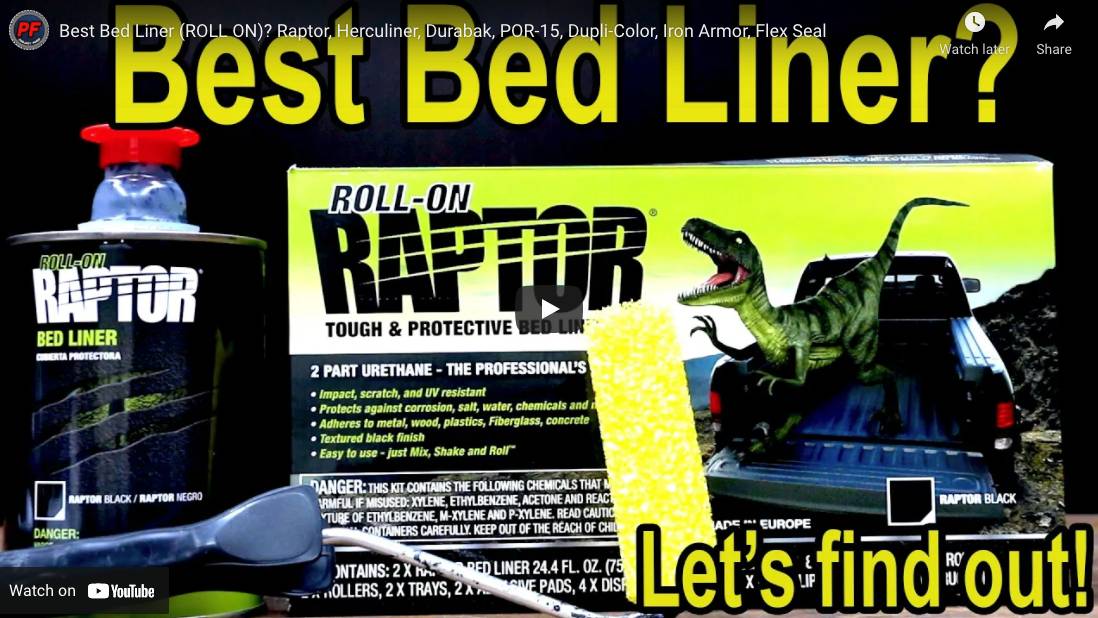
Durabak: The Navy-Approved Workhorse
Durabak earns its reputation as a top-tier one-part moisture-cure coating, trusted by the U.S. Navy for over 30 years. It comes in both smooth and textured finishes, is self-leveling, and requires zero mixing—perfect for DIYers who want professional results without the guesswork. With 16+ colors (including military olive, desert tan, sand, and dark grey), matching factory or tactical looks is straightforward. A quart covers roughly 15 sq. ft. and a gallon covers 60 sq. ft. in a standard two-coat application. Apply it between 40–95°F, wait 1–2 hours between coats, and it’s drive-ready after 24 hours. Full cure takes 4–7 days. It bonds to metal, plastic, fiberglass, rubber, and painted surfaces, though bare metal benefits from a primer. Users consistently praise its flexibility, chemical resistance, and sound-dampening properties.
Raptor Liner: Off-Road Community Favorite
Raptor Liner dominates off-roading forums for good reason. This tintable, spray-on coating lets you match OEM or custom colors (685 Desert Tan is a popular choice). One user painted an entire Ram truck with it and reported the finish still looked fantastic a year later. Available on Amazon, Raptor works well on full vehicles, cab roofs, and engine bays. Some enthusiasts mix it with ceramic beads for added heat resistance. It’s versatile, rugged, and built for abuse.
Rust-Oleum Professional: Accessible Polyurethane Strength
If you want industrial-grade protection without specialty spray gear, Rust-Oleum Professional Bed Liner Paint is a solid pick. One 2015 Blazer owner cleaned with degreaser, sanded lightly, applied primer, and laid down three coats with light sanding between layers. After 18 months of gravel and rock exposure, the finish still looked factory-grade. The catch: it’s a full weekend project when done right.
Dupli-Color Rattle Cans: Small Job Champion
When you only need to coat a grille, battery box, or trim piece, Dupli-Color’s 16.5 oz rattle cans (around $22 each) deliver convenience without tools. An M1089 owner applied it over deteriorated fiberglass gel coat with just quick hand sanding—over a year later, it still looks pristine and prevents painful splinters. One can covered the grille and battery box with half left over for touch-ups.
Rhino Liner Roll-On: No Spray Equipment Needed
Rhino Liner’s roll-on formula is ideal for DIYers avoiding spray guns. An M715 owner applied it to the bed and floor and reported zero complaints. The thick, matte, rubberized finish resists scratches, handles ice and salt, and offers excellent traction. It trades aesthetics for pure function.
Tractor Enamel: Budget-Friendly Smooth Alternative
If the sandpaper texture turns you off, tractor enamel offers smooth, paint-like feel and “bomb-proof” durability. Brands like Rust-Oleum Farm and Implement Enamel or Majic (from Tractor Supply) run under $100 for a full truck. One user painted a carcass in 50°F weather with minimal prep and survived South Dakota winters, snow shovels, and power washing without issues. Colors like Cat Yellow and Massey Ferguson Grey are widely available.
Prep Like a Pro: The Step That Makes or Breaks the Job
Clean and Degrease Every Surface
Poor prep is the #1 cause of bed liner failure. Dirt, grease, wax, and old coatings sabotage adhesion. Wash every surface thoroughly with a strong degreaser, then wipe down with isopropyl alcohol for a final clean. Any contamination left behind will cause peeling months later.
Sand for a Strong Mechanical Bond
Light to moderate sanding creates the “tooth” your coating needs to grip. On fiberglass, a quick hand sand may suffice. On metal or glossy paint, use 180–320 grit sandpaper. Don’t skip this step—even on surfaces that look rough. One Tahoe owner learned the hard way after the liner peeled in spots due to insufficient sanding. Rule of thumb: if it shines, sand it.
Prime Bare Metal for Corrosion Protection
While some products claim no primer needed, bare metal benefits from a rust-inhibiting primer. A thin coat of epoxy or metal primer boosts adhesion and prevents corrosion from creeping under the liner. Check your product’s specs—some require primer for warranty coverage.
Mask Off Everything You Want to Keep
Bed liner is unforgiving. Mask windows, lights, trim, and seals using plastic sheeting and painter’s tape. Once cured, bed liner resists nearly all removal attempts without damaging underlying surfaces.
Apply Using the Right Method for Your Skill Level
Spray for the Most Professional Finish
Spray application delivers the most even, controllable result. An HVLP spray gun works well for both smooth and textured finishes. Apply 2–3 thin passes rather than one heavy coat—thick coats bubble and crack. Different tips create different textures: fine tips for smooth, wider nozzles for grip. Eastwood users who applied thin HVLP layers reported no chipping after a year.
Roll-On for DIY Simplicity
No spray gun? A roller gets the job done. Durabak includes a free 4-inch stipple roller with textured gallon purchases, perfect for achieving grippy finishes. Standard rollers work for smoother results. Roll in overlapping strokes, avoid puddles, and maintain a wet edge for consistent texture.
Brush for Edges and Touch-Ups
Brushing is the simplest method—best for corners, small areas, or spot repairs. Use a high-quality synthetic brush to minimize bristle marks. It’s slower and less even, but ideal for hard-to-reach zones.
Rattle Can for Quick Fixes
Dupli-Color and similar aerosols shine on grilles, bumpers, and trim. Hold the can 10–12 inches away, apply light even coats, and let each pass dry before adding another. Don’t flood the surface—build coverage gradually to avoid drips.
Maximize Durability With Proven Techniques
Apply Multiple Thin Coats, Not One Thick Coat
One thick coat is the fastest path to cracking and bubbling. Apply 2–3 thin layers instead, waiting 1–2 hours between coats. Sand lightly with 400-grit between coats if you want a smoother finish. Three coats deliver maximum protection and longevity.
Respect the Full Cure Time
Don’t rush it. Bed liner may feel dry in hours, but full chemical cure takes 4–7 days depending on the product. Avoid washing, heavy loads, or pressure washing during this window. A user who followed curing instructions exactly reported their 2-part polyurethane job still looking “brand new” after 18 months.
Add Ceramic Beads for Heat Control
Boost performance by mixing in NASA-formulated ceramic beads. At $60 for enough to mix with 5 gallons of paint, the upgrade pays off in hot climates. Users report a 10°F drop in surface temperatures with one coat, plus enhanced durability and sound deadening.
Avoid Dragging Heavy Items Across Cured Liner
Even fully cured bed liner can scuff under sharp or heavy loads. Use a rubber bed mat or liner mat when transporting metal objects or rough cargo to preserve the finish.
Evaluate the Aesthetics Before You Commit
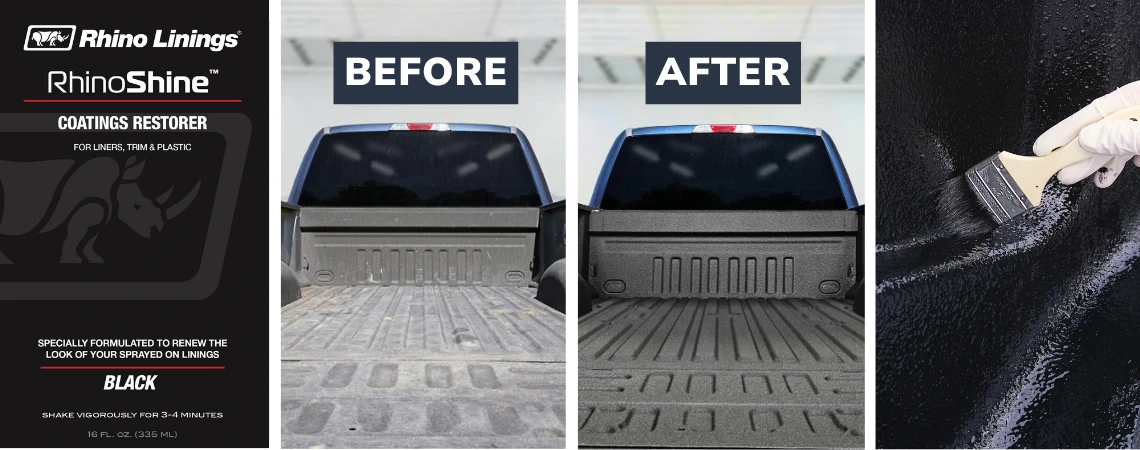
Smooth vs. Textured: Choose Your Finish
Durabak and others offer both options. Smooth mimics traditional paint—ideal for exteriors or interiors where comfort matters. Textured provides grip and hides dents—perfect for beds, floors, and work vehicles. Some users mix smooth and textured versions to balance feel and function.
Color Options and Matching Capabilities
Durabak’s 16+ colors include military olive, sand, and tan—near-perfect matches for stock military vehicles. Raptor Liner is tintable, so you can match any OEM or custom shade. Test a small area first; some products carry a satin sheen that may not match flat or gloss finishes.
Texture Feel: Sandpaper or Smooth Paint?
Textured bed liner often feels like 300-grit sandpaper. It’s great for traction but unpleasant on bare skin. Tractor enamel avoids this entirely and feels like regular paint. If comfort matters, choose smooth bed liner or traditional enamel for exterior surfaces.
Hide Imperfections or Highlight Them?
Bed liner effectively hides scratches, dents, and aging bodywork. One user painted over a scratched bed and later added a camo pattern with Behr paint on top. Thin coats can reveal unevenness, so apply evenly for the best results.
Understand the Risks and Limitations
It’s Permanent—Removal Is Brutal
Bed liner bonds like armor. Full removal requires sandblasting, chemical strippers, or aggressive grinding, often damaging the substrate. Multiple forum veterans warn: “It’s a one-way street.” Think long-term before committing.
Fad or Functional? Match the Use Case
Full-vehicle bed liner is polarizing. Some off-road enthusiasts love it; others consider it a trend they’ll laugh about in five years. Use bed liner where protection matters most—beds, floors, bumpers—not necessarily on hoods or doors unless you’re fully committed.
Cheap Products Fail
Stick to proven brands: Durabak, Raptor, Rust-Oleum Professional, Dupli-Color. A failed Tahoe job used generic paint with poor prep and peeled within months. Quality products plus proper prep equal success.
Temperature Affects Application and Curing
Apply in the 40–95°F range. Cold slows curing; heat causes bubbling. One tractor enamel job succeeded at 50°F, showing budget options can work in less-than-ideal conditions if applied correctly.
Compare Costs and Value
Product Price Breakdown
- Durabak Textured: $49.95–$169.95 per gallon
- Durabak Smooth: $54.95–$189.95 per gallon
- Raptor Liner: Varies, typically $150+
- Dupli-Color Rattle Can: $22 per 16.5 oz can
- Tractor Enamel: Under $100 for a full truck
- Ceramic Beads: $60 (covers 5 gallons)
Tractor paint wins on budget. Bed liner wins on protection, sound deadening, and grip. For work trucks, bed liner justifies the investment. For daily drivers, consider enamel for body panels and bed liner for high-wear zones.
DIY Saves Thousands
Professional bed liner jobs cost $1,000+. A DIY full-vehicle job runs $200–$300 in materials. One weekend of work delivers long-term durability at a fraction of the price.
Real-World Results: What Actually Lasts?

18 Months and Counting
A 2-part polyurethane job on a Blazer survived 18 months with zero issues. The user cleaned, sanded, primed, applied thin coats, and allowed full cure. Verdict: “Worth the time and effort.”
One Year on a Full Ram Truck
Raptor Liner on an entire Ram looked fantastic after a year. No fading, peeling, or texture loss—proof that quality products deliver when applied correctly.
Over a Year on Fiberglass
Dupli-Color on an M1089’s grille and battery box stayed flawless. Minimal prep, but the bed liner sealed deteriorated gel coat and prevented splinters.
Failure: Peeling in Months
A Tahoe bed job failed because of poor prep—only light sanding and no degreasing. Lesson reinforced: prep matters more than product choice.
Frequently Asked Questions About Truck Bed Liner Paint on Cars
Is truck bed liner paint a good idea for an entire car?
It depends on your priorities. Bed liner offers extreme durability, corrosion resistance, and sound dampening, but it’s nearly permanent and textured. For off-road builds, work trucks, or vehicles in harsh climates, it’s a solid choice. For daily drivers where resale value and smooth aesthetics matter, it’s risky.
How long does bed liner paint last on a car?
With proper prep, quality products, and full curing, bed liner can last 18+ months or longer without visible degradation. Failures typically occur within months and almost always trace back to inadequate surface preparation.
Can you remove bed liner paint from a car later?
Removal is extremely difficult. Sandblasting, chemical strippers, or grinding are required, and all risk damaging the underlying surface. Treat bed liner as a permanent decision.
How much does it cost to bed line an entire car DIY?
Material costs run $200–$300 for a full vehicle using products like Durabak or Raptor. Professional installation costs $1,000+. Tractor enamel offers a budget alternative under $100 for a full truck.
Does bed liner paint really work as sound deadening?
User reports confirm bed liner provides sound dampening comparable to Dynamat or Lizard Skin. It reduces vibration and noise from metallic items in the bed, making it a dual-purpose upgrade for interiors.
What’s the biggest mistake people make with bed liner paint?
Skipping or rushing surface preparation. Cleaning, sanding, and priming are non-negotiable steps. The #1 cause of peeling and failure is inadequate prep—not bad product.
Key Takeaways for Using Truck Bed Liner Paint on Cars
Truck bed liner paint on a car delivers extreme durability, corrosion protection, and a distinctive utilitarian aesthetic—but it’s a permanent commitment that demands respect. The most critical success factor is thorough surface preparation: degrease, sand, prime, and mask before you even open the can. Quality products like Durabak, Raptor Liner, and Rust-Oleum Professional consistently outperform cheap alternatives when applied correctly. For maximum protection, apply multiple thin coats and allow full cure time (4–7 days for most products). If the sandpaper texture feels too aggressive for full-vehicle use, consider a hybrid approach: bed liner for beds, floors, and high-impact zones, paired with smooth tractor enamel for body panels. Budget-conscious builders can achieve “bomb-proof” results with tractor enamel under $100. For most drivers, the smartest next move is to test a small area first, calculate coverage needs carefully, and commit only after understanding that once bed liner goes on, it’s staying on.