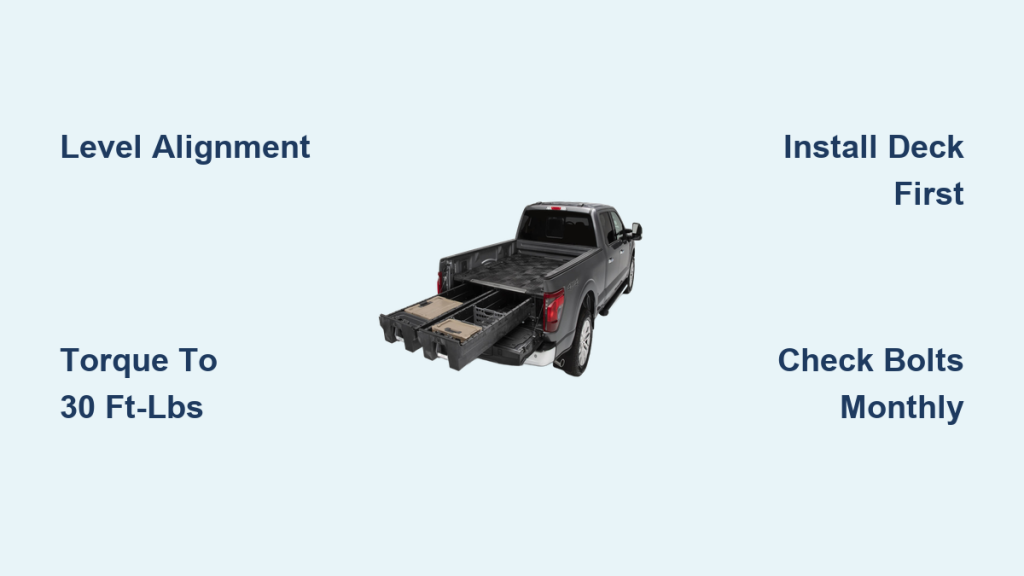
Installing a Decked truck bed storage system transforms your open bed into a secure, weatherproof workstation with heavy-duty drawers built directly into the frame. Whether you haul tools to the job site or gear to the trailhead, Decked delivers a flat cargo surface on top and organized storage underneath, all without drilling into your truck. The complete installation typically takes under two hours with basic tools and a helper. This guide covers every phase of the Decked truck bed installation, from unboxing to final load testing, so you can hit the road with confidence.
Prepare Your Truck and Workspace
A clean workspace and a level truck set the foundation for a flawless Decked installation. Skip this step and you’ll spend extra time fighting alignment later.
Choose a Flat, Well-Lit Location
Park on level concrete or asphalt with plenty of room to move around the truck. A driveway or garage works well. Make sure you have overhead clearance for lifting long drawer rails. Engage the parking brake and chock the wheels if you’re on an incline.
Clear the Truck Bed Completely
Remove everything from the bed, including mats, liners, tie-downs, and aftermarket accessories. Sweep out dirt, gravel, and debris. Any leftover material can interfere with rail placement or scratch the composite decking.
Gather Tools and Safety Gear
Decked ships most hardware, but you’ll need a few standard tools. Grab safety glasses and work gloves before starting.
Unbox and Inspect the Decked System
A careful inventory prevents mid-installation surprises. Decked systems arrive in multiple boxes depending on your bed size.
Identify All Components
Standard Decked kits include:
- Two HD Drawers (left and right, labeled)
- Front and rear rail assemblies
- Crossbars (two to four, depending on bed length)
- Composite decking panels
- Hardware kit with bolts, washers, and locking tabs
- Installation manual and warranty card
Verify Against the Packing List
Lay parts out in order of installation. Check every panel and rail for shipping damage. Confirm bolt quantities match the manual. If anything is missing or damaged, contact Decked customer support before tearing into the install.
Mount the Front Rail Assembly

The rails anchor your entire Decked truck bed system to the factory frame rails. Front rail placement sets the alignment for everything downstream.
Position the Front Rail
Locate the shorter front rail and slide it into the bed, resting it on the inner frame rails near the cab. Match the pre-drilled holes with the factory holes in your truck’s frame. Use the provided 13mm bolts and washers to finger-tighten the hardware. Repeat on the opposite side.
Check for Equal Cab Clearance
Measure the distance from the cab to the rail on both sides. A quarter-inch difference now causes drawer binding later. Adjust until measurements match, then leave bolts loose for now.
Install the Rear Rail Assembly
The rear rail supports the back of the drawers and tailgate end of the deck.
Position and Bolt the Rear Rail
Slide the longer rear rail into place across the rear frame rails, just ahead of the tailgate. Align the holes and insert bolts loosely. Once both rails sit in position, place a level across the top to confirm they match side to side.
Torque All Rail Bolts to Spec
With alignment verified, torque every rail bolt to 30 ft-lbs using a torque wrench. This specification matters. Over-tightening strips threads, while under-tightening lets the system flex under load.
Attach the Crossbars

Crossbars bridge the front and rear rails, creating the structural grid that supports the decking and drawer slides.
Slide Crossbars Into the Rail Slots
Decked crossbars are labeled by position (Front, Center, Rear). Slide each one into the receiving slots on the rails. Align the holes and secure with 15mm bolts and locking tabs.
Confirm Locking Tabs Click Into Place
The locking tabs prevent bolts from spinning loose from vibration. Press each tab until you hear or feel it seat. Torque bolts to 30 ft-lbs once all crossbars are in position.
Install the Composite Decking Panels
The decking creates the flat, durable surface of your new truck bed platform.
Snap Panels Into Place
Start at the front of the bed and work toward the tailgate. Press each composite plank down firmly until it locks into the crossbar grooves. Most panels drop in without tools.
Trim the Final Panel if Needed
Some bed configurations require trimming the last panel to clear the tailgate. Use a circular saw with a fine-tooth blade for clean cuts. Test-fit before cutting.
Walk-Test the Deck
Step across the full surface after installation. There should be zero flex or creaking. Any movement means a crossbar bolt needs attention.
Mount the HD Drawers
The Decked drawers hold up to 200 lbs each and glide on full-extension ball-bearing slides. They’re the payoff for the rest of the install.
Slide Drawer Rails Into the Channels
Each drawer has integrated side rails. Align the rail ends with the channels on the front and rear crossbars. Gently slide the drawer in from the side of the bed. Remember, drawers are side-specific. Left and right are not interchangeable.
Secure the Drawer Rail Mounting Points
Once seated, fasten the rear of each drawer rail to the crossbar using the provided 5mm hex bolts. This stops vertical movement when you load heavy gear.
Test Drawer Operation
Open and close each drawer slowly. Smooth gliding with no binding means you’re aligned correctly. If you feel resistance:
- Clear debris from the rail channels
- Loosen crossbar bolts slightly and realign
- Retorque to spec
Spray the ball-bearing slides with silicone lubricant for long-term smooth action.
Final Inspection and Load Test

A quick post-install check catches problems before they become roadside headaches.
Recheck Every Fastener
Walk around the system and tug on each bolt. Retorque anything that feels loose. Focus on rail-to-frame connections, crossbar bolts, and drawer rail mounts.
Perform a Load Test
Place 50 to 100 lbs of weight across the deck. Open and close the drawers under load. No sagging or creaking means the system is sound. Drive slowly over a speed bump and listen for rattles. Silence is success.
Common Installation Mistakes to Avoid
Most Decked installation errors come from rushing the alignment phase.
Skipping the Level Check
Uneven rails cause drawer binding and uneven deck surfaces. Always verify level before final torque.
Over-Tightening Hardware
The 30 ft-lbs spec exists for a reason. Stripped bolts mean a trip back to the hardware store mid-install.
Forgetting the Locking Tabs
Skipping locking tabs invites rattles and loose bolts down the road. They take seconds to install and save headaches later.
Installing Drawers Before Decking
Always complete the deck before mounting drawers. Otherwise, you block access to crossbar hardware and fight the geometry.
Maintenance Tips for Long-Term Performance
A few minutes of care keeps your Decked truck bed system working like new.
Clean Debris Weekly
Sweep out leaves, dirt, and job site dust. The composite decking is fully washable, so rinse with a garden hose as needed.
Inspect Bolts Monthly
Vibration loosens hardware over time. Check key fasteners every few weeks and retorque as needed.
Lubricate Drawer Slides Every 3–6 Months
A shot of silicone spray keeps the ball-bearing slides gliding smoothly and prevents corrosion.
Respect the Weight Limits
Each drawer handles 200 lbs, but spread heavy loads evenly. Avoid stacking weight on open drawers.
Frequently Asked Questions About Decked Truck Bed Installation
Do I need to drill into my truck to install Decked?
No. Decked uses a bolt-together design that attaches to factory mounting points. There is no cutting, drilling, or permanent modification required.
How long does a Decked installation take?
Most DIYers complete the Decked truck bed installation in 90 minutes to two hours. Having a helper speeds up the rail and drawer placement steps.
Can one person install Decked alone?
Possible, but not ideal. The rails and drawers are heavy and awkward. A second person makes alignment much easier and safer.
What tools do I need for Decked installation?
A socket wrench set (10mm, 13mm, 15mm), a torque wrench, a 5mm hex bit, a cordless drill, a tape measure, and a level cover the basics. No specialty tools required.
How much weight can Decked drawers hold?
Each HD Drawer supports up to 200 lbs of gear. The deck surface above handles even more when weight is distributed.
Will Decked fit any truck?
Decked makes vehicle-specific systems for most popular pickup models. Confirm fitment on the Decked website before ordering.
Key Takeaways for a Successful Decked Truck Bed Install
A proper Decked installation boils down to three essentials: level alignment, correct torque, and patience during the rail-mounting phase. Start with a clean bed, verify measurements before tightening, and respect the 30 ft-lbs torque spec on every bolt. Once installed, perform a quick monthly bolt check and lubricate the drawer slides twice a year to keep everything operating smoothly. With the install behind you, you’ve turned your open bed into a mobile workstation built for years of hard use. Ready to get started? Lay out your components, grab your torque wrench, and give yourself a clear afternoon to transform your truck.